My Favorite Colors. It May Not Be What You Expected.
I thought it might be fun to share my favorite colors to work with while everything outside is dead and brown and dormant.
Some may think that since I’m a flower farmer that I love all flowers and any color of flower because, well, it’s a flower! While that may be the case for some, that is definitely not the case for me! I’m actually pretty picky when it comes to the types of flowers and colors that I like.
While I grow almost every color, there are definitely some colors I enjoy growing more of and ones I tend to fill the field with a bit more than others. Most of my color choices among a crop are based off of what I know others like in that particular season, but I’d be lying if I said I didn’t also choose based on my own personal preference!
If I grew simply for my own enjoyment, you would not see a single bright yellow, bright orange, red, or maroon flower in my garden. It would be packed full of:
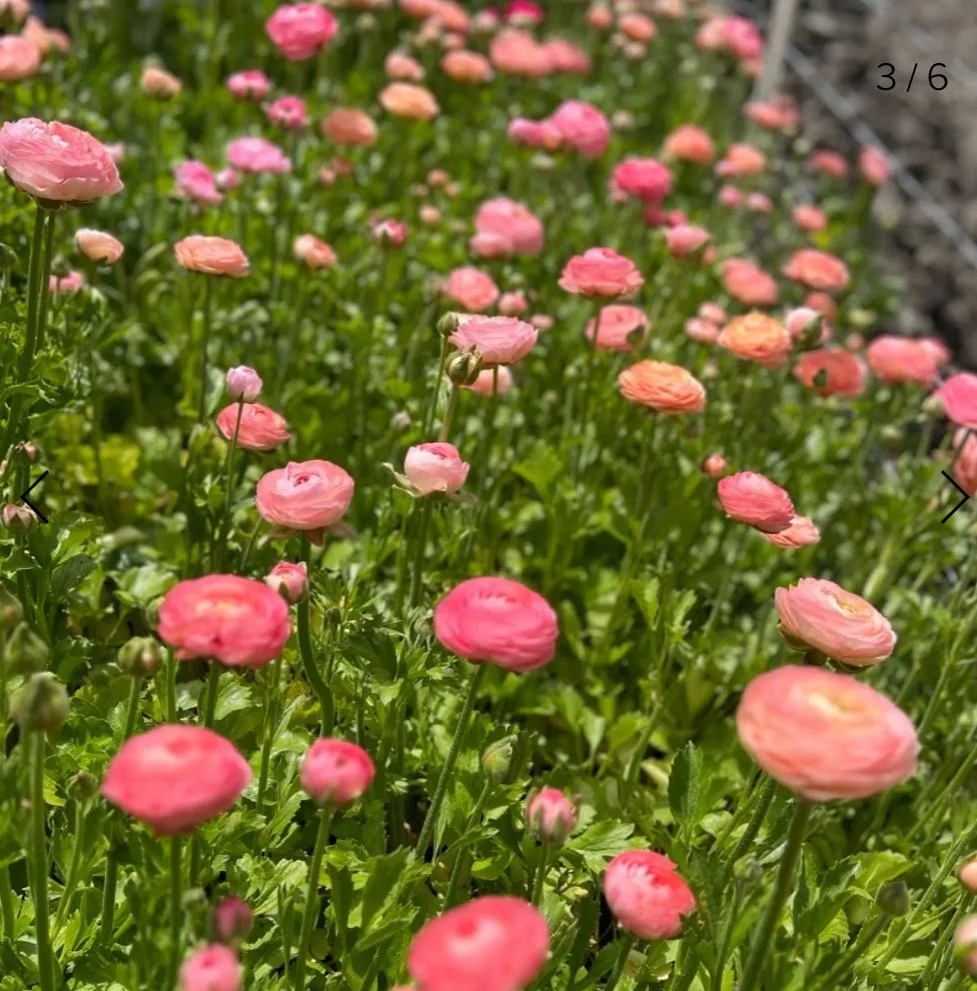
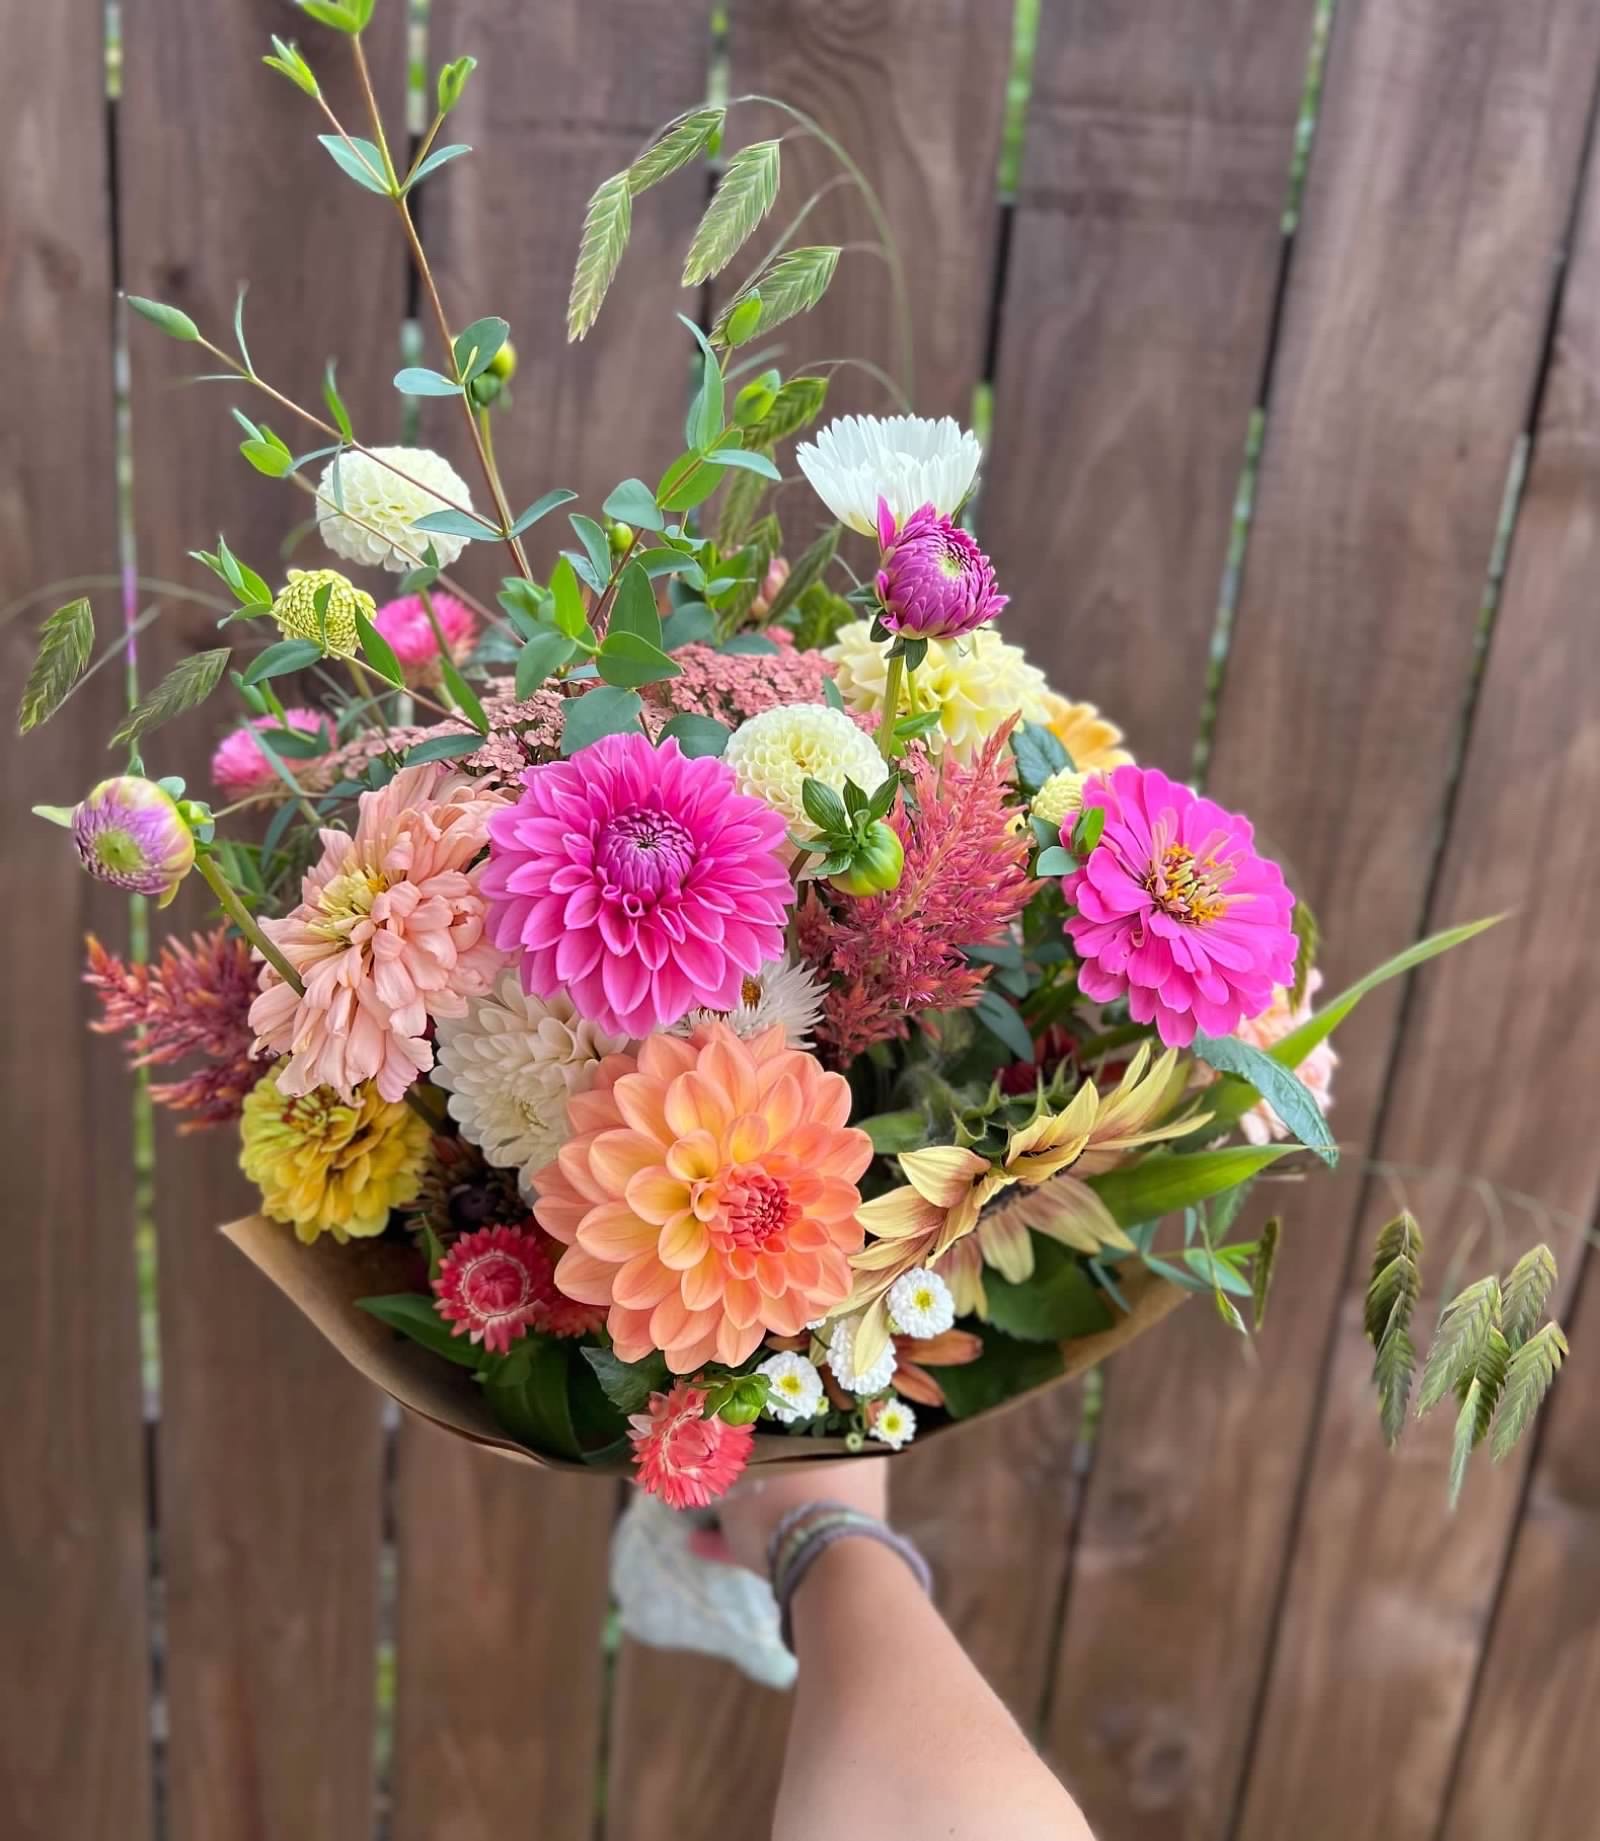
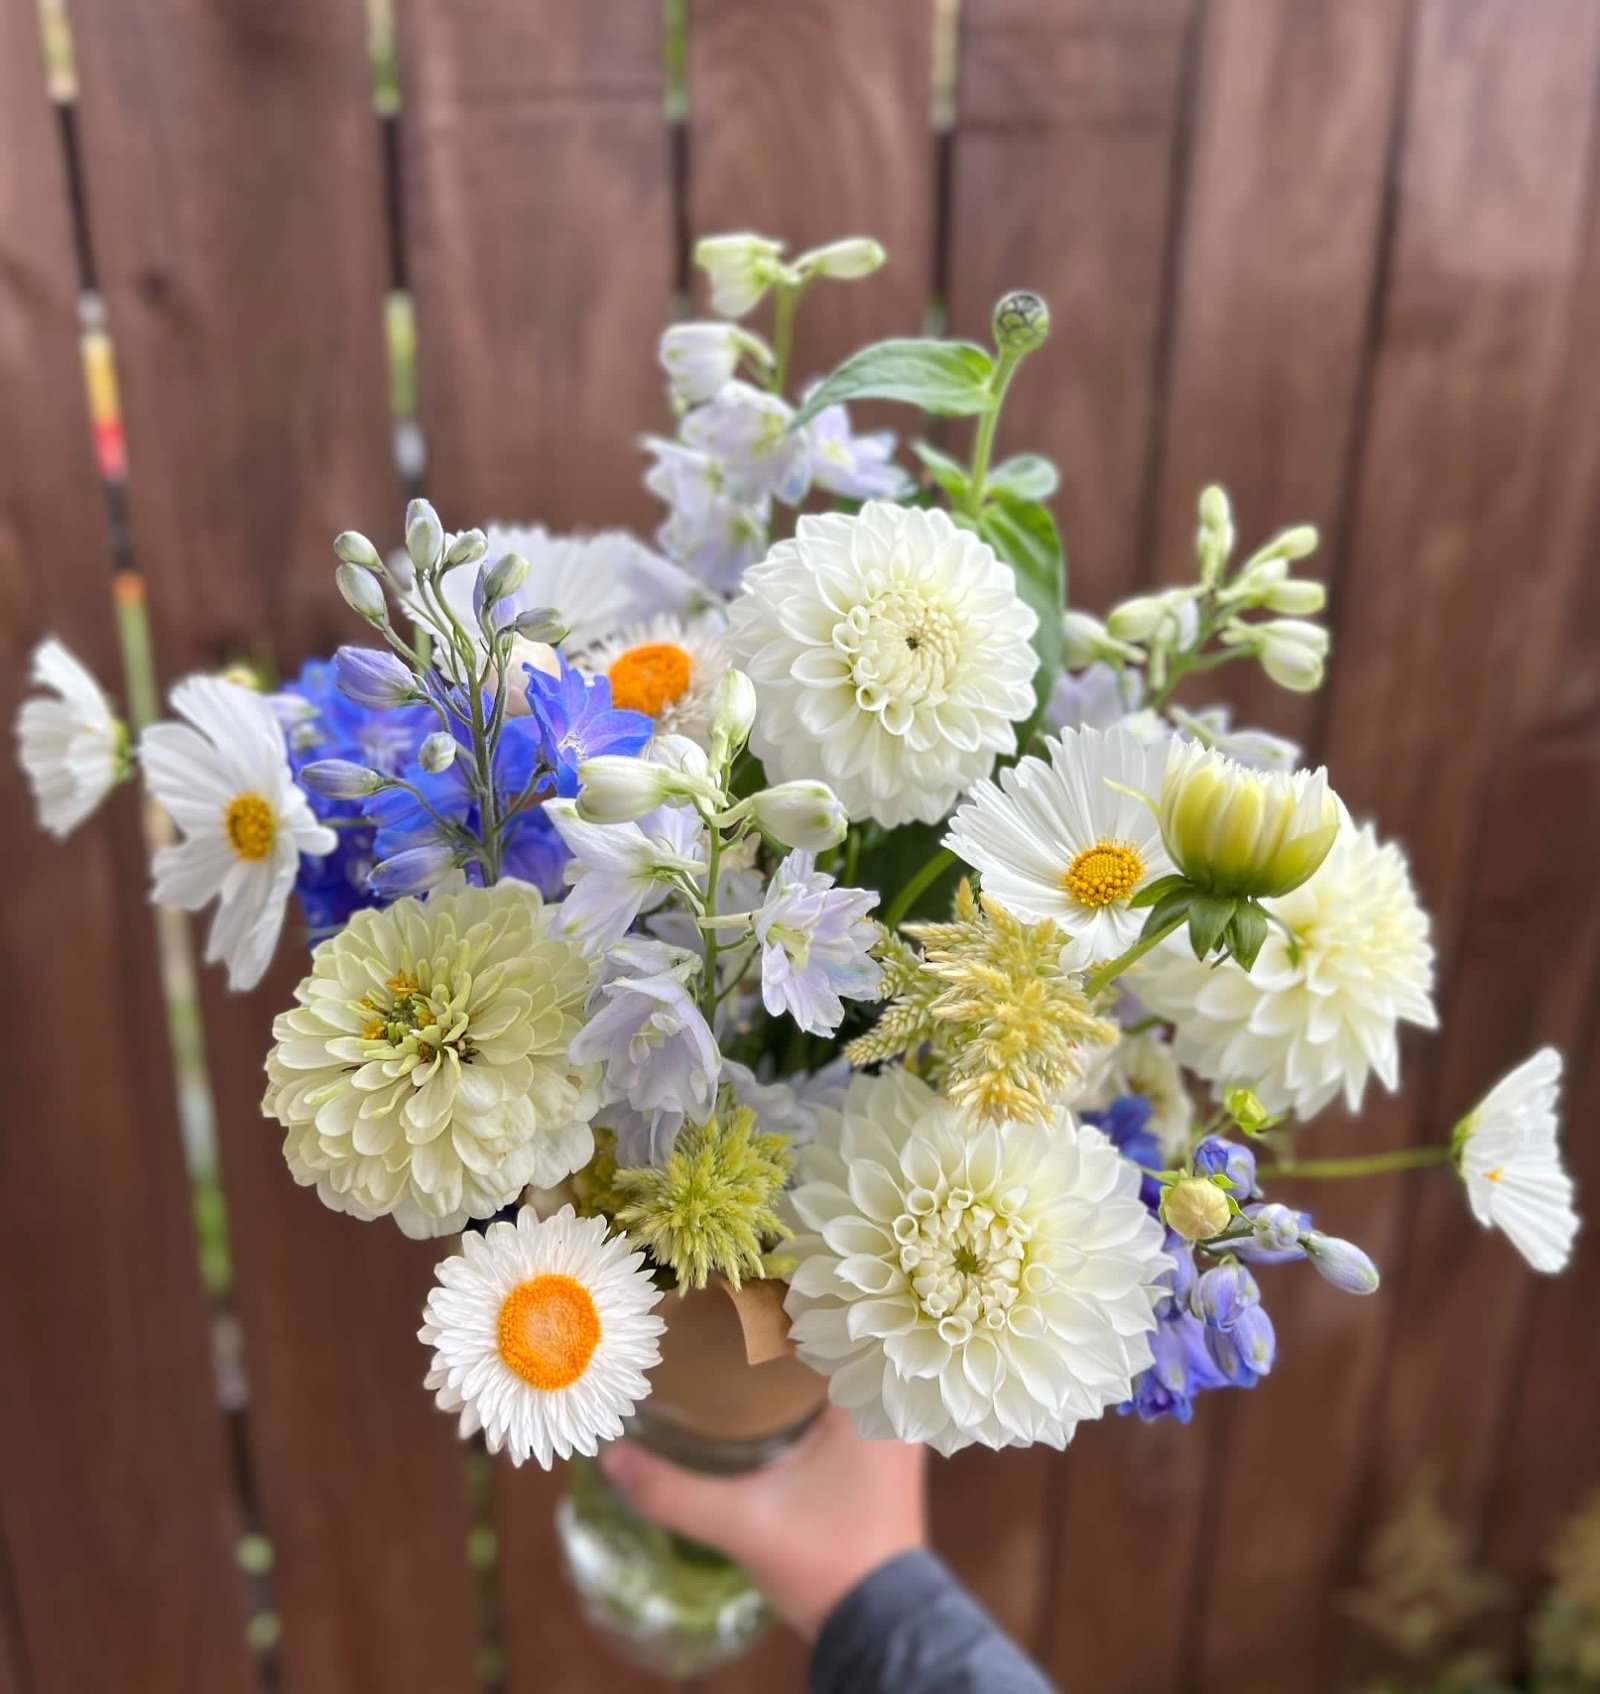
Blush | White | Pink | Peach
I will never tire of seeing these colors of flowers.
If a variety comes in one of these colors AND it has a tight, full petal structure, it is among one of my favorite flowers to grow (I’m talking about you ranunculus, garden roses, peonies, and dahlias!)
There is something so beautiful and visually pleasing to me to see a clean, soft color palette with texture and complexity.
I do find that I gravitate a little more toward brighter colors in mid summer, so I do enjoy a slightly brighter pink or coral flower in the heat of the summer when the days feel bright, cheerful and endless.
My interior design is quite similar as well. In my home, I like a clean look with a soft, light color palette and a focus on textures and natural elements. In the middle of summer I enjoy a little pop of color, but the muted tones are definitely my overall preference. I find that the soft tones and natural elements help to calm my busy mind that is constantly running.
I think that is why I gravitate toward those same, calming colors and textures in my flowers.
Do you like these colors too? I’d love to hear your favorites and if you’d like to see me grow more of a particular color in the future!
Shelby
10 Fun Facts About Me
I thought for this month’s blog I’d share a few random facts about me! I’m terrible at sharing a fun fact when put on the spot in a group gathering (it’s actually my nightmare as an introvert!). However, I enjoy hearing random things about other people and with a little prep, I’m ready to share facts about me!
1. I’m terrified of spiders, and I regularly scream at snakes and lizards. It seems a bit odd that I chose to do something that regularly puts me around these guys, but that just speaks to how much I love flowers! Haha
I can kill the teeniest, tiniest spider but any others I have to have Zack or Finley kill for me. As far as snakes and lizards, I’m less scared of them but I’d say they startle me easy. It is not out of the ordinary for me to scream once or twice while working with the flowers. My family knows to ignore my screams mostly now. I oftentimes wonder what my neighbors (who live extremely close by) think haha
2. We have two boys, and I love it. We have two boys and that is actually how I always wanted it. I never had a strong desire to have a girl (although I would not have been upset at all if we did have one). After having Finley, my desire for a second boy was even stronger (because he was just so awesome, I wanted another Finley!). We don’t plan to have any other kids. Our family feels complete with our two sweet boys.
3 I can’t sit still. I’m not known among my family members as one who is content sitting still. Even from a young age, my mom put me in gymnastics to help get out my energy. To this day, I don’t often sit still for more than a few minutes. I prefer productivity over rest. Being productive feels restful for my busy mind.
4 I obsess over hobbies. I’m also not one to do something halfway. Every hobby I’ve ever had quickly becomes a bit of an obsession. Flower farming is no different. It took less than a year for my casual gardening hobby to turn into full blown flower farming!
5. I used to teach tennis lessons. I began playing tennis my freshman year of high school. And like I said above, it became my sole hobby for many years. Throughout my high school years I played 10-15 hours per week minimum. Once I graduated and had a job, my play time cut back a little because I just had fewer free hours in the day but I still played 6 days a week for 1-2 hours typically. I played on an adult traveling team for 5+ years as well! Once I graduated high school I began teaching tennis to kids (and eventually adults). I taught tennis lessons for 9 years. I then gave up that job to have more time with finley once he was born since the hours I taught were oftentimes evenings and weekends.
6. I am a PTA. I went to school to become a physical therapist assistant after graduating high school and have been a licensed PTA since 2015. After having our second son, Joseph, I decided to take some time off to have more time with the boys at home. This has also allowed me to put a little more time into flower farming since that is a job I can oftentimes do with them. I love being a PTA and plan to someday return to that job part time, but for now I’m really enjoying my time with my boys.
7. I did gymnastics for 9 years. As I said above, my mom put me in gymnastics when I was 5-6 because I was flipping around on the furniture anyway so she figured I may as well learn how to do it a little more safely! Haha. As most hobbies are, I did gymnastics as my primary hobby for 9 years. I was obsessed. I’d have practice 6-10 hours per week (depending on the time of year) and would go home and stretch or practice for hours more each day. I’m so thankful for my time in gymnastics. It made me very strong, flexible, and taught me a lot of body awareness. All things I’ve been able to carry with me into adulthood.
8. I’d rather be home than out. The older I get, the more I lean into my introverted tendencies. I’m a pretty quiet person unless I’m talking about something I’m passionate about.
I’d prefer to be home with my family than out in town. Thankfully Zack is the same way so we enjoy a lot of time as a family.
9. If out, rather be doing activity than sitting and talking. When we go out, I’d much prefer to spend my time with someone doing a fun activity together (like a hike) than sitting down at a fancy restaurant talking.
10. I’d rather have an adventure vacation than sitting on a beach. Even though I prefer to be home most of the time, I love vacations with my family. We are not the sit and relax type of vacation-goers though. We love going on adventures when on vacation. Walking around town, seeing the sights, going on a waterfall hike, those types of things!
I hope you enjoyed learning a little more about me. I’d love to hear if any of these fun facts are something we have in common!
Shelby
Ranunculus, Peonies, Sweet Peas Oh MY! Why You Need To Grow These
Spring flowers in general are just the best! Ranunculus, peonies and sweet peas are exceptional and on my “Forever Must Grow” list. Ranunculus are special for their long vase life and tightly packed petals. Peonies are special for their fragrance and their monster sized blooms. Sweet peas are special for their whimsical vines, ruffly blooms and incredible fragrance.
Would you love to grow these beauties as well? I’d love to share with you a few simple tricks to become a master in no time!
Ranunculus
While it’s quite odd to receive these dried up octopus things, they turn into the incredible blooms you see me share each spring!
If you live in zone 7 and up, it is advised to plant them in the fall to give their roots time to establish in the cool weather so they can quickly spring into action as the weather begins to warm. However if you live in a cooler zone it is still possible to grow ranunculus, you just want to start them in the late winter instead of the fall.
They are technically hardy uncovered down to 28 degrees, but mine have survived temperatures a few degrees cooler.
If you don’t have a commercial sized high tunnel, you can still grow ranunculus! I grow using low tunnels, also called caterpillar tunnels. To make a low tunnel, you need frost cloth (I buy mine from Johnnys Seed) or 6 mil plastic, 2’ rebar stakes, and 10’ pvc. Hammer the 2’ stakes half way into the ground on the edge of your 4’ bed. Then take your pvc pipe and bend it to make an upside down U shape and slide the pvc over the rebar stakes. Do this every 5’ or so then cover them when your temperatures are forecasted to drop below 28 degrees. If you only have a few plants, you can put them in pots and bring them into your garage on cold nights.
Ranunculus take roughly 90 days to bloom and they start to go dormant when your temperatures are in the 80s consistently. So you want to make sure that you start them early enough in the season to enjoy them!
To get them started, soak them for 3-4 hours to help them rehydrate.
Once soaked, they can either be planted directly in ground or pre sprouted (meaning planted into seed starting trays temporarily). I plant mine directly in ground in October, but my November and February succession get pre sprouted. I found that when I planted directly in the ground later in the year, I lost some corms to rot because they took too long to wake up and were wet for too long without a root system to soak up the water.
To presprout, after soaking your corms, place them into seed starting bottom trays with a light layer of soil covering them and have them in an environment around the 50s (my garage works perfectly). They will take 10-20 days to form roots and sprout above the soil. At that time you can plant them out in the garden!
Peonies
Need I say more? Peonies are one of the most readily recognized flowers by anyone (second only to roses). The best part about peonies is that they are pretty darn easy to grow! Well, okay the best part is their breathtaking blooms, but the easy to grow part is pretty great too!
As long as you live in a climate that gets decently cold in the winter (zone 9 and below), peonies will be happy to grow in your yard and will only get better with time, gracing you with loads of softball sized blooms. When you receive a bare root, they look kind of like ugly sweet potatoes with little pink buds (these are called the eyes).
The eyes are what determines the size of the root. You’ll see roots advertised as 2/3 eye, 3/5 eye, or 5/7 eye most commonly. This basically refers to the maturity of the root and how quickly it will develop and give you those dreamy blooms you’re looking for. Generally speaking, If you purchase a 3/5 eye root, you will get 0-1 blooms year one. If you purchase a 5/7 eye you will get 1-2 blooms year one.
If you want to speed up the process of getting tons of blooms per plant, you can pinch off the pea sized flower bud in the first and second year. By doing this you forfeit blooms for that year but will be paid in more blooms the following year. When you don’t allow your peony to flower, your plant will focus on root development and it will be bursting with blooms in year 3. This is not a mandatory practice though. You are welcome to let it bloom year one and admire those beauties!
Make sure when planting your peonies that you choose a sunny location with good drainage throughout the whole year. Peonies like plenty of water (even in the summer months when it's just foliage), but they don’t like standing water around them.
Plant them shallow. They will not come up if planted too deep. You want the eyes to be 2” below the soil surface.
While few pests bother peonies, it is common to see ants on your peony buds. They do no harm! They just like the sticky sap peonies produce on their buds. You can simply rinse them off with water or gently flick them off if it is time to harvest and they're still there (most often they are gone by that time though).
Peonies are susceptible to fungal diseases. It is best practice to spray with a fungicide (I choose organic) several times throughout the early season. I spray biweekly for a few months and rotate between 2-3 types (copper fungicide, regalia, and neem oil). By rotating fungicides, you help to avoid resistance to the treatment.
If you are growing them in your garden for pleasure, offer them support in the form of a peony ring or tomato cage as the massive blooms are so heavy that when they are fully open, they will faceplant into the dirt- not a pretty sight! If you are growing them with the plan to harvest the blooms, there’s no need to support them as you will be harvesting them once they reach the “marshmallow” stage (when the bud is soft to the touch like a marshmallow), so it's unlikely they’ll flop.
Sweet Peas
These beauties bring such whimsy and fragrance to your garden. Their twisting vines grow without abandon, scurrying up the structure you plant them under. Their ruffly blooms are full of fragrance. They're such a delight to bring inside to enjoy!
They’re pretty simple to grow too! Make sure you offer them a structure with plenty of support (I use hortonova netting pulled nice and tight or square hog panel fencing as their support structure to climb. They can grow 6-8’ high without much trouble so make sure they have plenty of vertical room.
They’re tough little flowers, not batting an eye at soft freezes and maintaining their hardiness down to the mid to low 20s if they've had enough time to establish a good root system before the freeze occurs. If you live in a warmer climate, fall planting gets you a head start to earlier blooms! No need to worry if you’re in a cooler climate though, these babies grow pretty fast, so a late winter sowing will still give you tons of spring blooms!
Pests that plague these guys are slugs, aphids, and thrips primarily. So be on the lookout for these guys and respond quickly when you find them. I choose organic pest control and focus on predator releases rather than spraying so that I don’t harm “the good guys” in the process of getting rid of “the bad guys.” (feel free to message me if you’re interested in my pest management practices, I created a guide explaining what I do!)
We will be offering these three varieties in our fall sale, so be on the lookout for more news if you want to try these for yourself!
I’d be happy to answer any questions you may have about these incredible flowers!
Shelby
A Flower Farmer’s Favorite Flowers
Have you ever wondered what a flower farmers favorite flowers are? Many factors go into what a flower farmers favorite flower is, not just beauty! While there is something to love about every flower, there are some that are definite stand-outs in my book!
Some of those are ease to grow, ease to harvest, pest resistance, duration they bloom, time of year that they bloom. Read below to find out mine! I will do my best to rank them, but it’s kind of like picking a favorite child!
Ranunculus
I think that these may be my favorite flowers of all time. Not only are they gorgeous, but they’re one of the first flowers to bloom on the farm. If I succession plant, I can keep them blooming for about 8 weeks. They’ve got an incredibly long vase life (sometimes lasting 2 weeks!). They don’t need any external support to keep them upright, so planting and removing the plants at the end of the season is much easier.
Peonies
Need I say more? Aside from roses, peonies are one of the most recognized flowers among the general public. What they lack in blooming duration (their season is about 4 weeks long) they make up for in beauty and ease to grow. They are not susceptible to many pests. They don’t need external support if you’re farming them because you harvest them prior to the bloom opening so they don’t get too top heavy and floppy. Their blooms are massive and impressive! And if you get a variety like coral charm or coral sunset, the bloom changes color in the vase. It transforms from vibrant coral to pink to peach to buff throughout the 4-7 days you have them in the vase.
Garden Roses
Did you know there are rose varieties that resemble peonies?! I didn’t until I began farming. Garden roses are full of petals and are shaped in that beautiful cupped form you find peonies shaped in. They bloom for a much longer season than peonies as well. I have roses blooming from May-October here. They are ranked below peonies because they are a much more labor intensive crop even though they are a perennial. They are susceptible to aphids, thrips, cucumber beetles, weevils, and many more so pest management is more labor intensive and costly. What they lack in ease of care, they make up for in beauty and bloom duration.
Dahlias
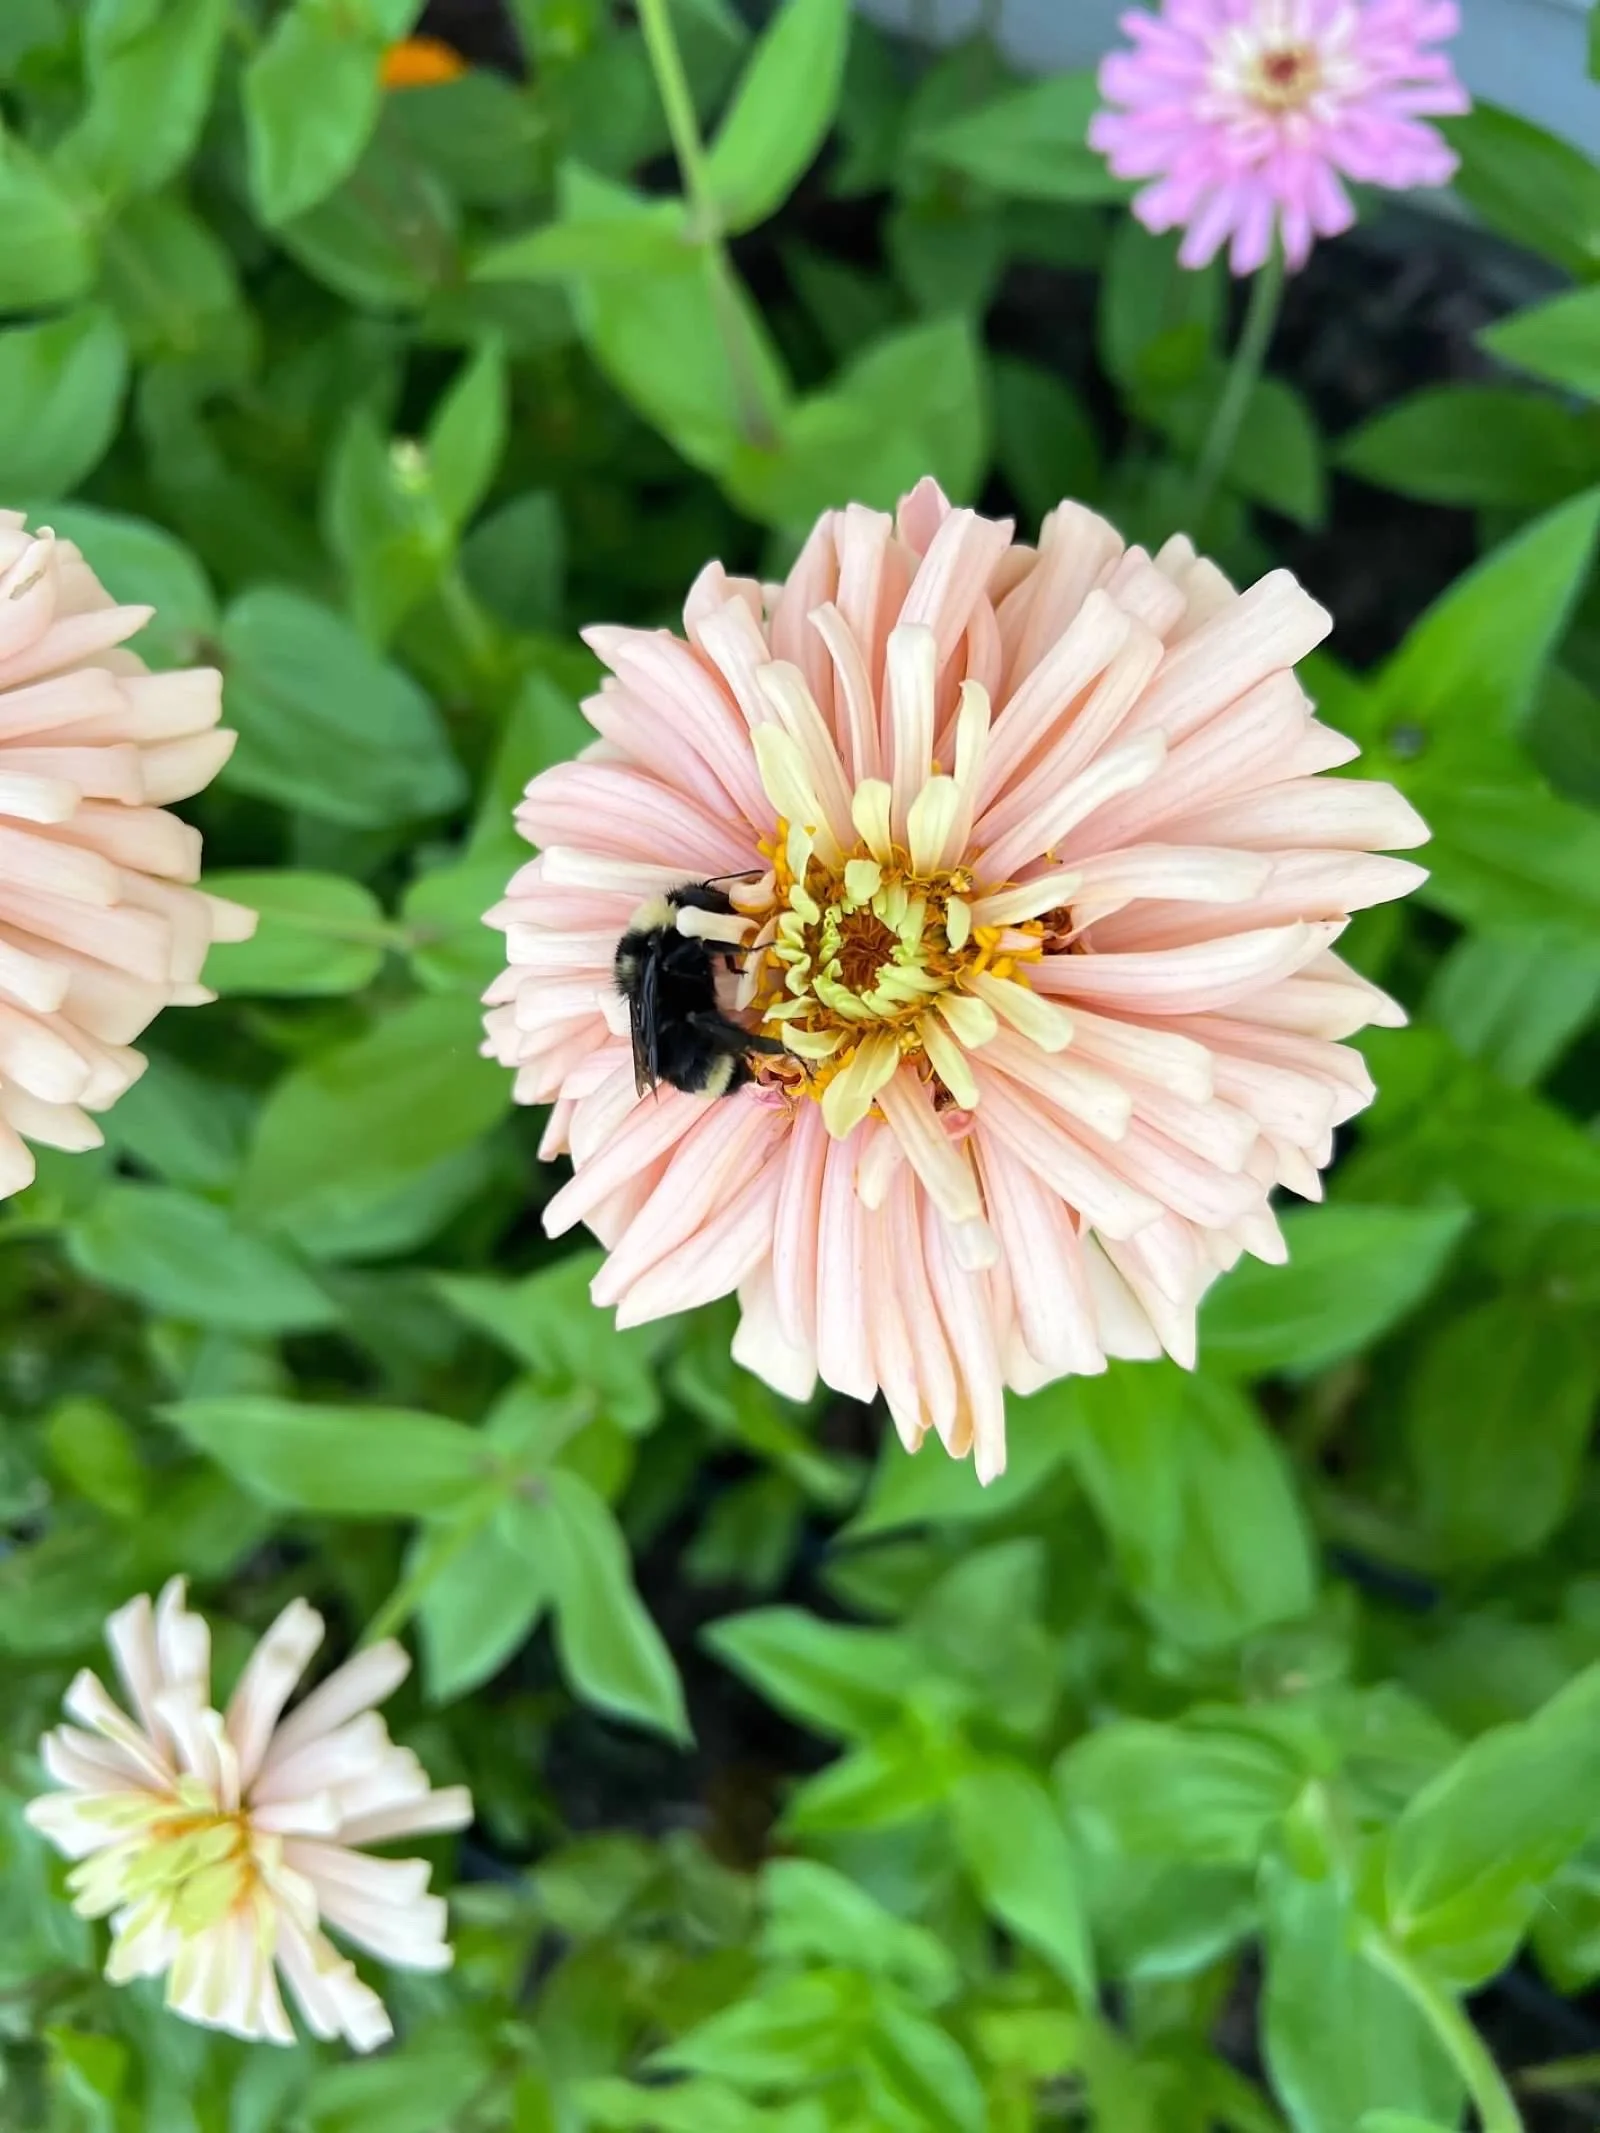
I love love love dahlias, but they are ranked below ranunculus, peonies, and roses due to the amount of labor they require. Not only do you replant each year as a farmer, but they need external support to keep them upright, they are pest magnets (much like roses), they are prone to diseases which can wipe out your entire crop if not culled upon discovery, they don’t have the longest vase life (4-7 days), and at the end of the season they all need to be dug (in the cold rainy weather oftentimes) and divided to be stored in a temperature and humidity controlled environment. Even with all of these downsides, I still choose to grow as many as I can fit on my farm. They are incredibly gorgeous! They come in a wide range of sizes (from 2”-12” in diameter), every color but blue and green, and a wide range of bloom shapes!
Zinnias
Back to easy to grow crops! Do you have terrible soil? Plant zinnias. Do you get drought-like conditions in the summer? Plant zinnias. Excessive year? Plant zinnias. A small space so you want as many blooms per plant as possible? Plant zinnias! These easy to grow beauties take little maintenance and come in a wide range of colors and shapes. I will never not grow zinnias. I especially love some of the more newly bred varieties and colors that are softer, more muted hues like blush, apricot, and peach. They’re to die for!
Sweet Peas
Why doesn’t love a whimsical vining flower that smells divine?! I love how I can use their vines for some fun whimsy and also their ruffly blooms that are not only beautiful but full of amazing aroma! What they lack in vase life, they definitely make up for in beauty and scent!
Double tulips
Back to early blooming beauties! Tulips are the second crop to bloom on our farm. So not only are they a welcomed treat after a long winter, the double tulips are incredible! Some of them resemble a peony as well! They are hardy with few pests that bother them (watch out for deer, bunnies, and rodents!). One of the downsides to farming with tulips is they are labor intensive in that you plant new ones every year and only get one bloom per bulb. They also bloom very quickly on a hot sunny day so you risk having hundreds of blooms open before you can harvest them rendering them useless as a farmer (other than beautiful photography). On a sunny day, I run out to harvest 3-5 times in order to get them harvested at just the right stage for my customers.
Cosmos
Remember all of the benefits of zinnias? Cosmos are very similar! The pollinators are also a huge fan of cosmos! One of the downsides to cosmos is that they bloom so often it can be hard to stay on top of harvesting. I harvest very deep in order to slow down their productivity. Even with harvesting extra long stems, I have to harvest them 3x per week to avoid deadheading tons of blooms.
Fancy Daffodils
The very first crop to bloom on my farm is the lovely daffodils. I used to think that I didn’t like daffodils because I thought they only came in school bus yellow. However they come in white, apricot and pale yellow too! There are also a multitude of shapes they come in to where some you wouldn’t even recognize as daffodils!
This is far from a comprehensive list of what I grow. And there are many other flowers that I love and will always grow, but in order to keep this post to a manageable length I’ll stop here.
I hope you enjoyed reading about some of my favorite flowers! I’d love to hear if some of my favorites are yours as well! If you can’t tell, my favorite types are the varieties that have a multitude of petals.
Shelby
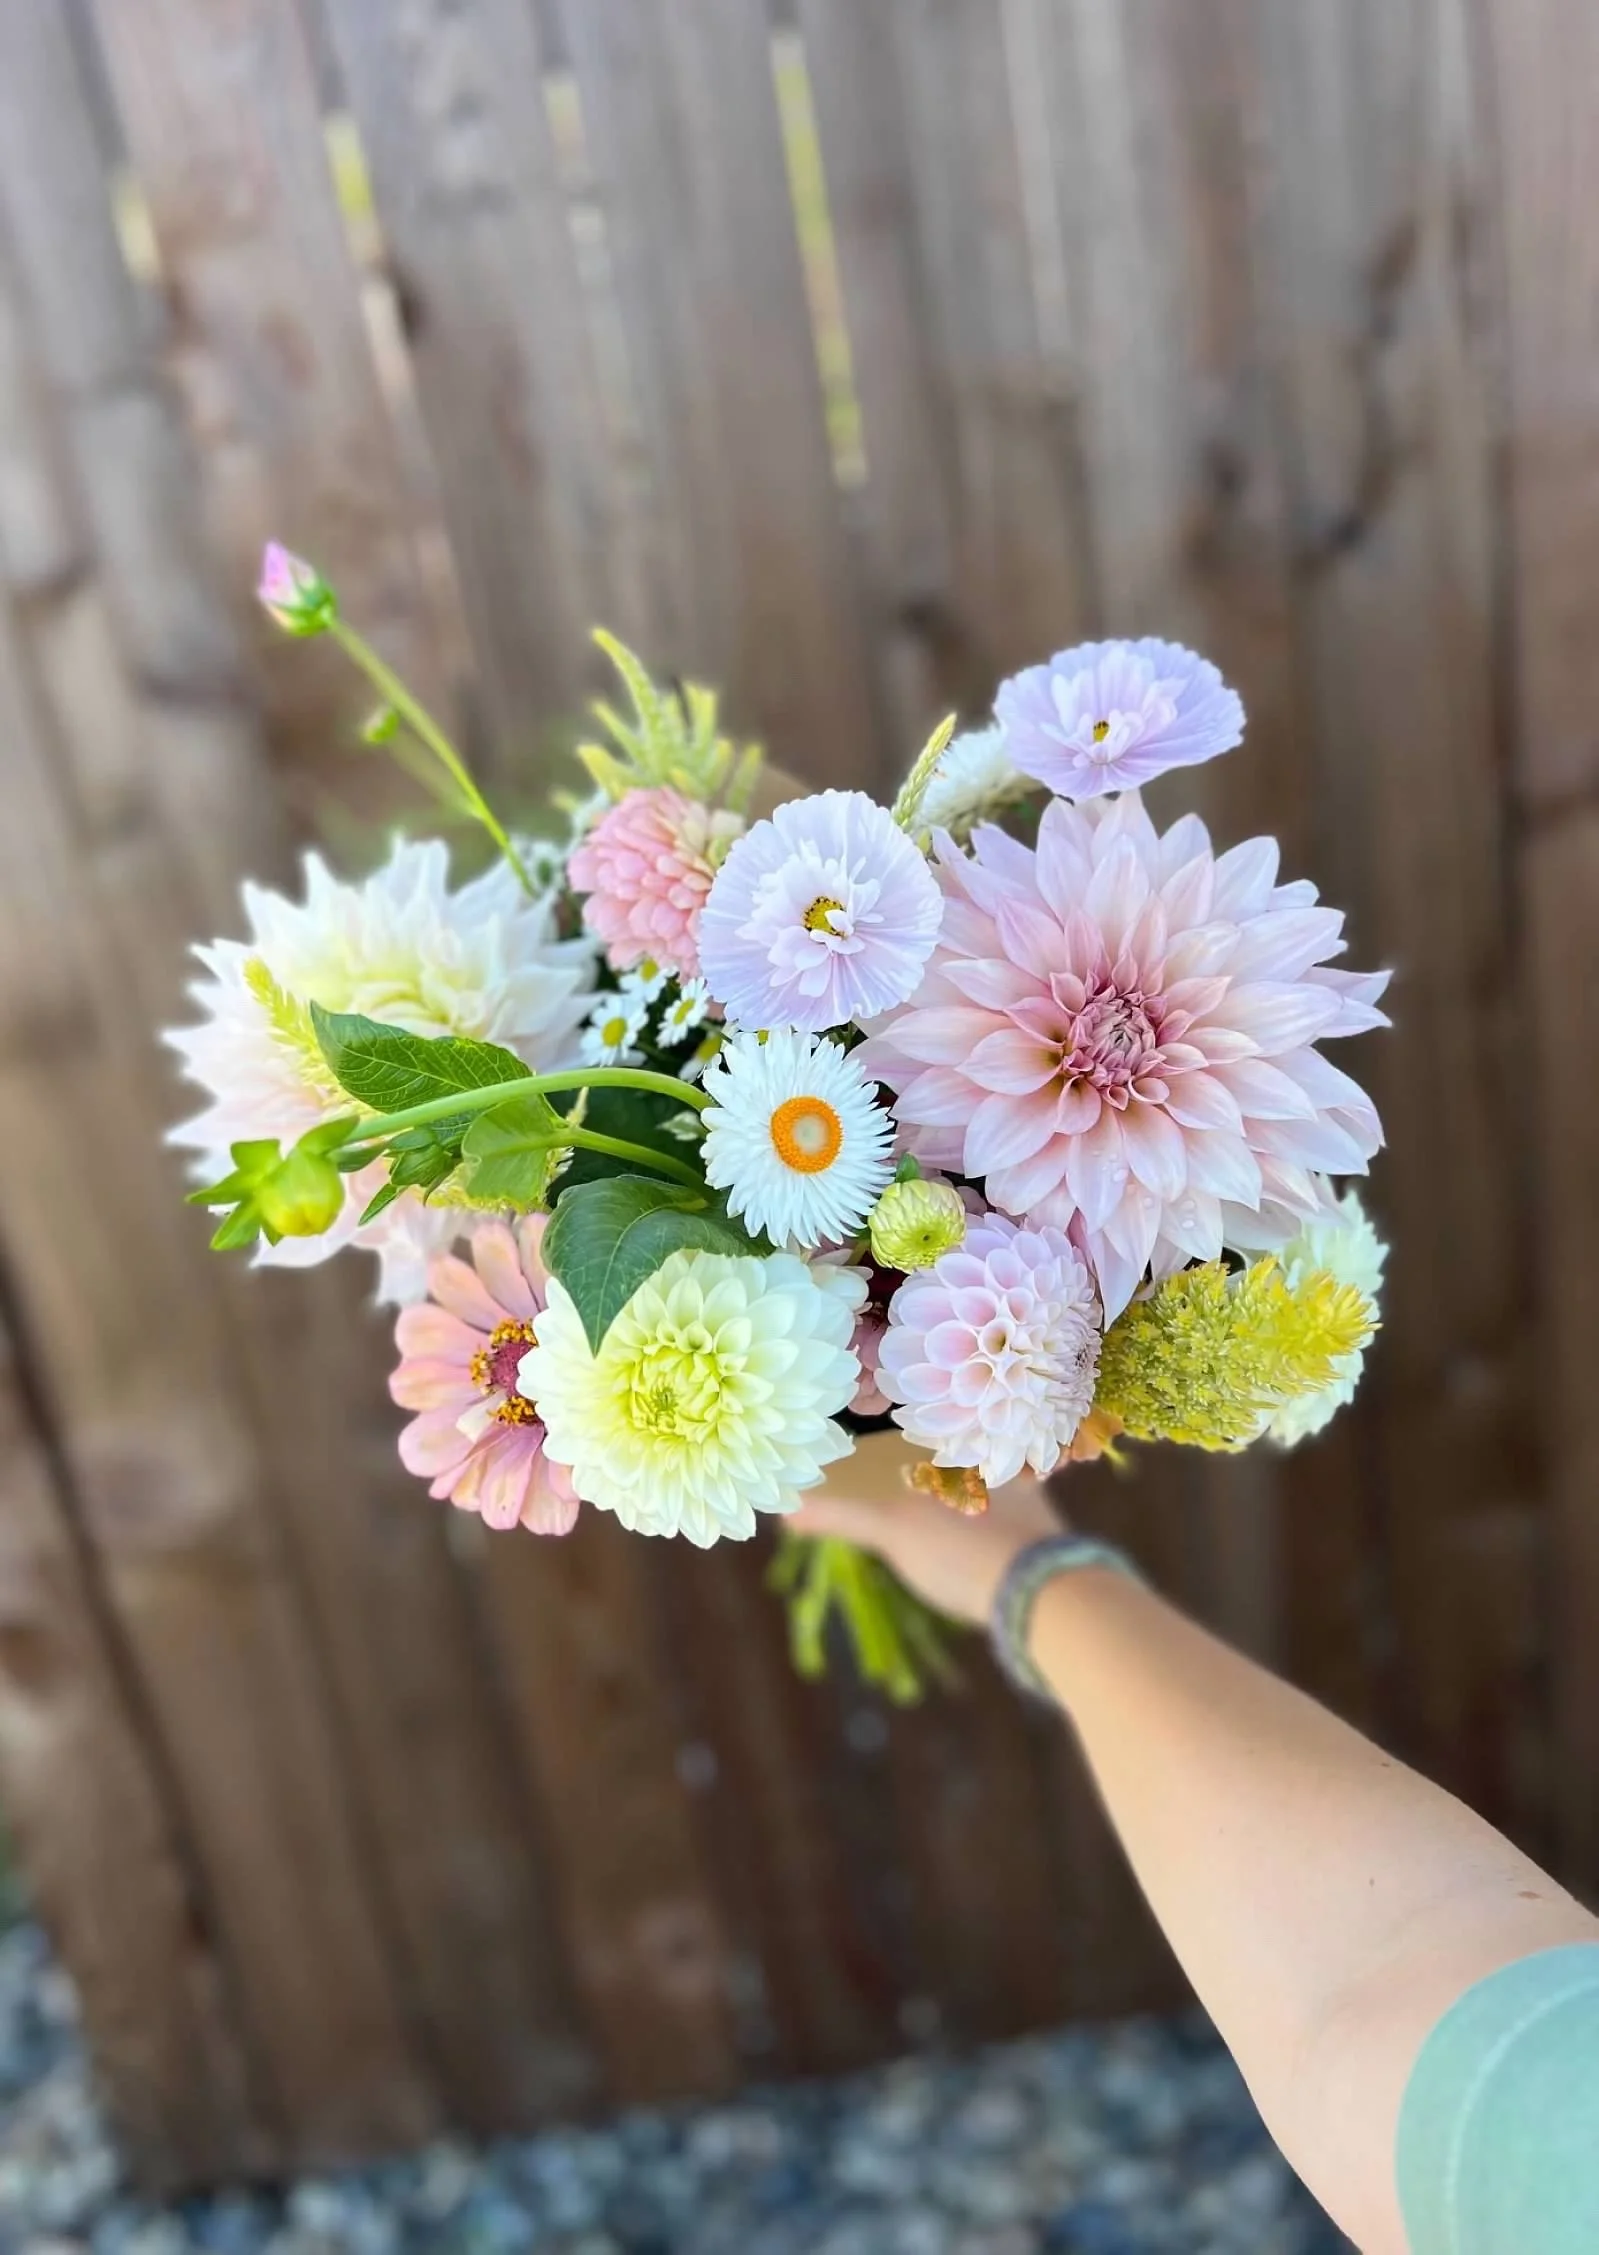
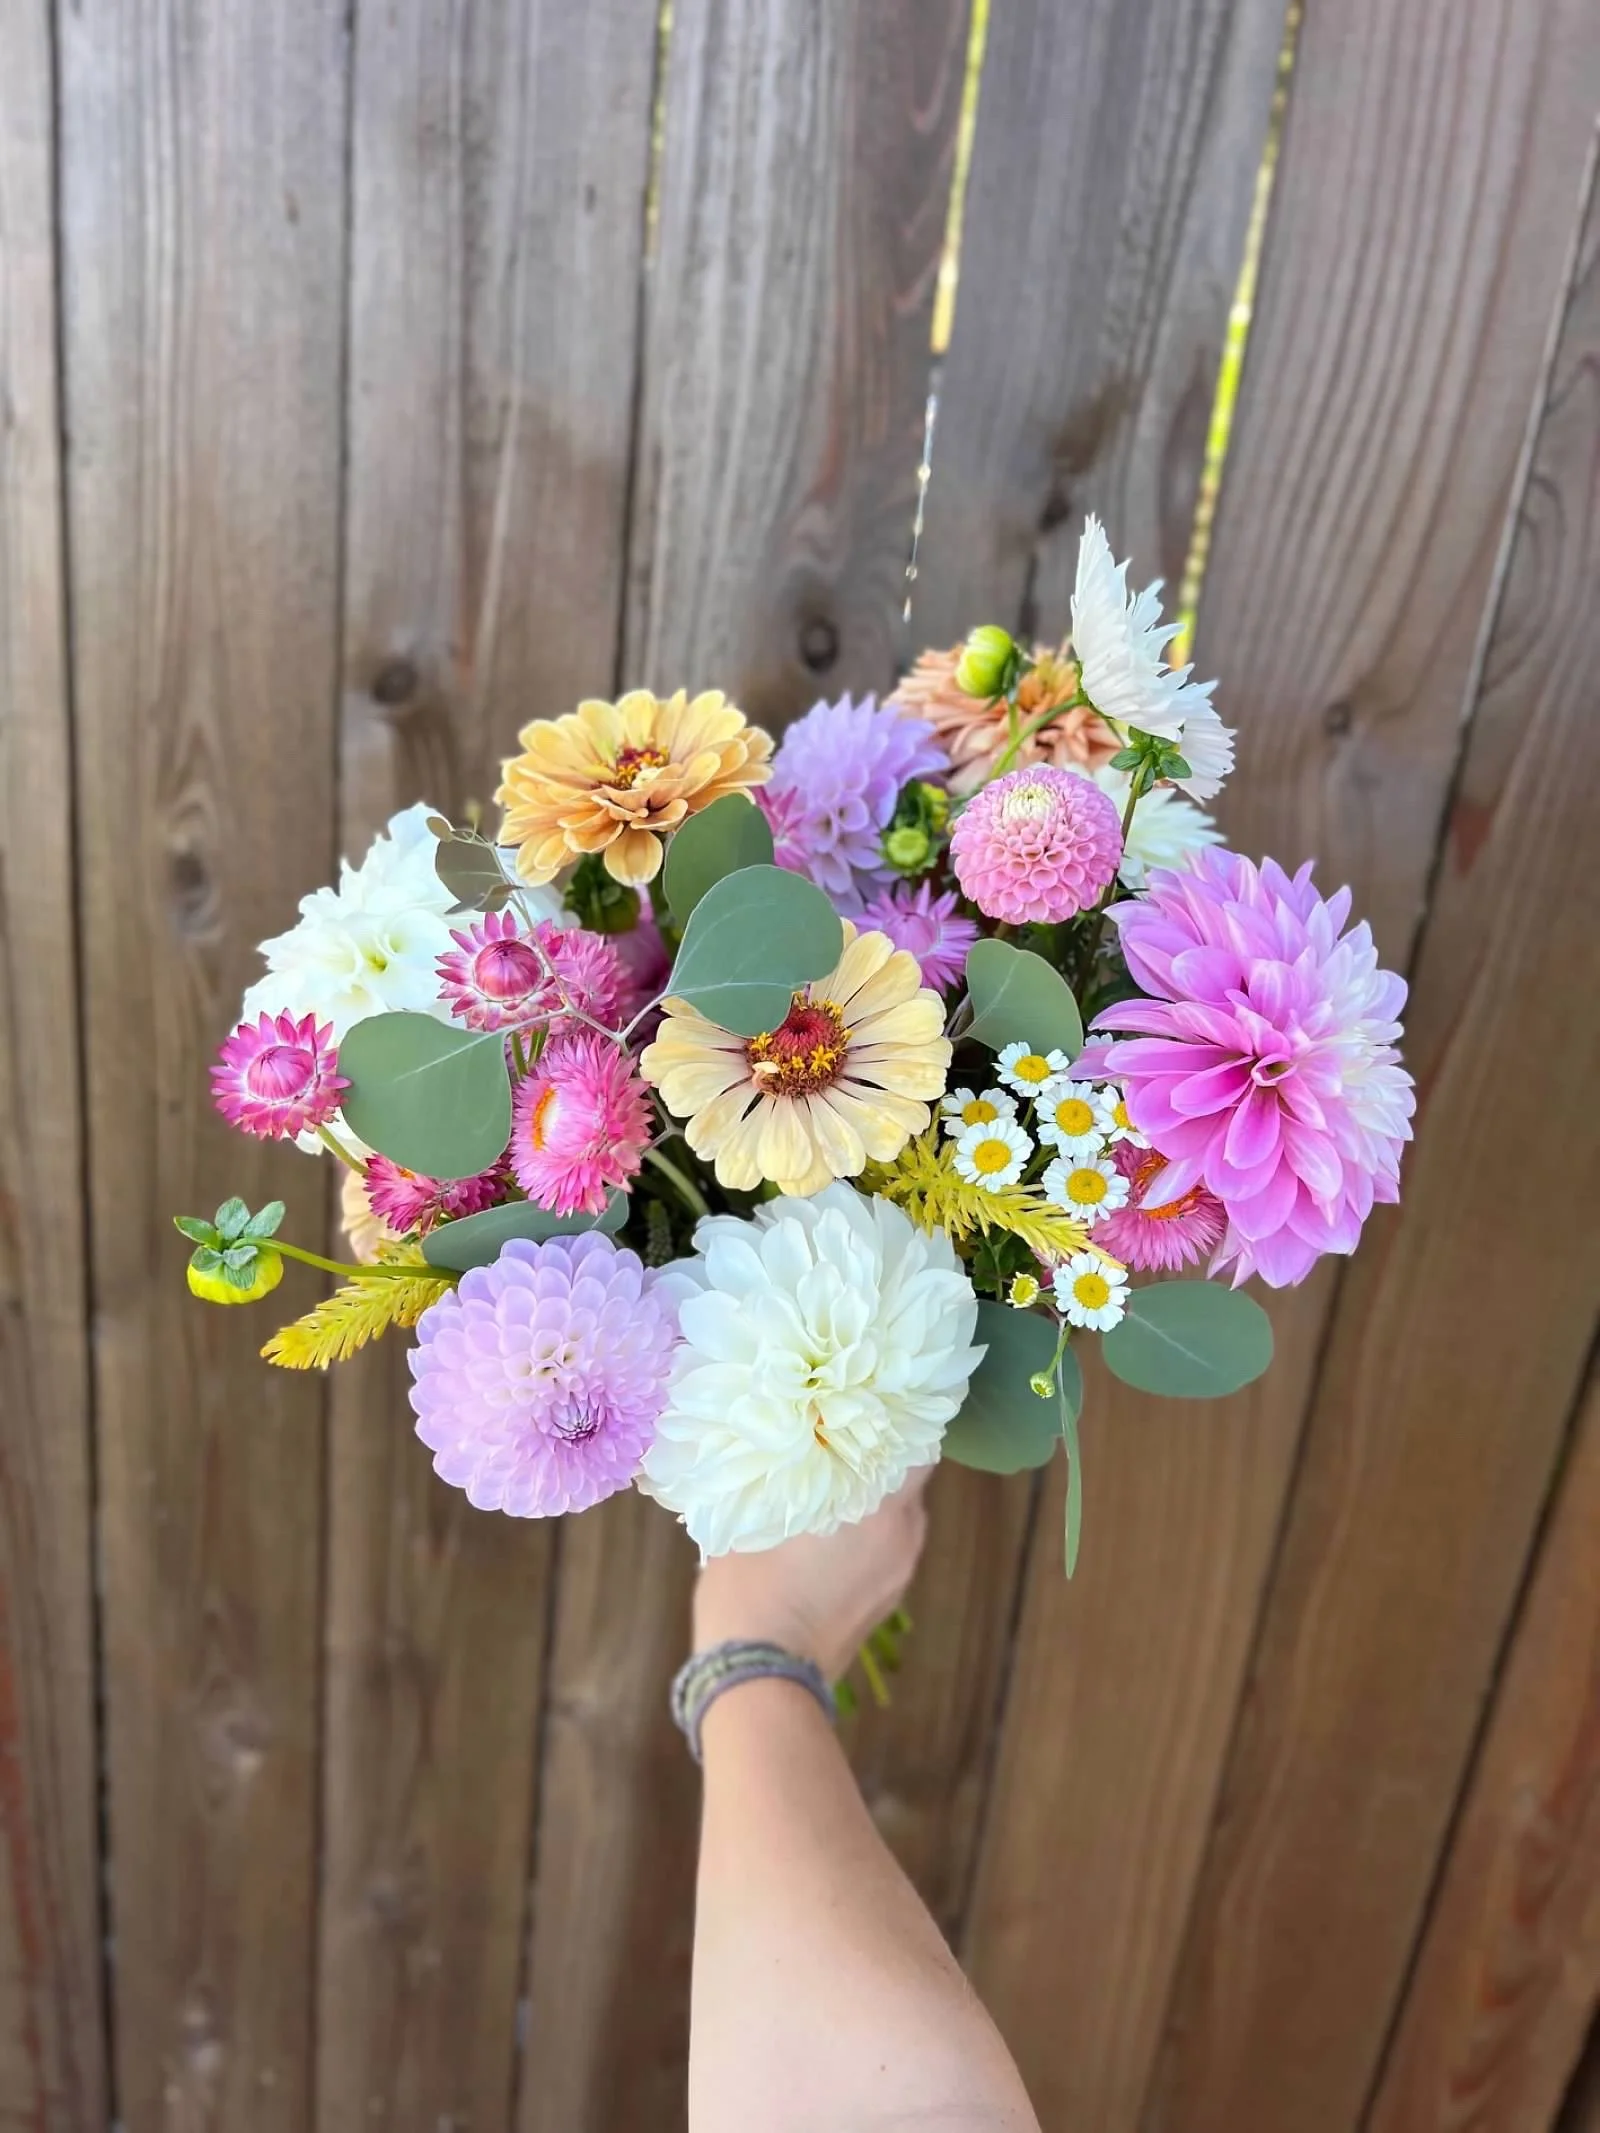
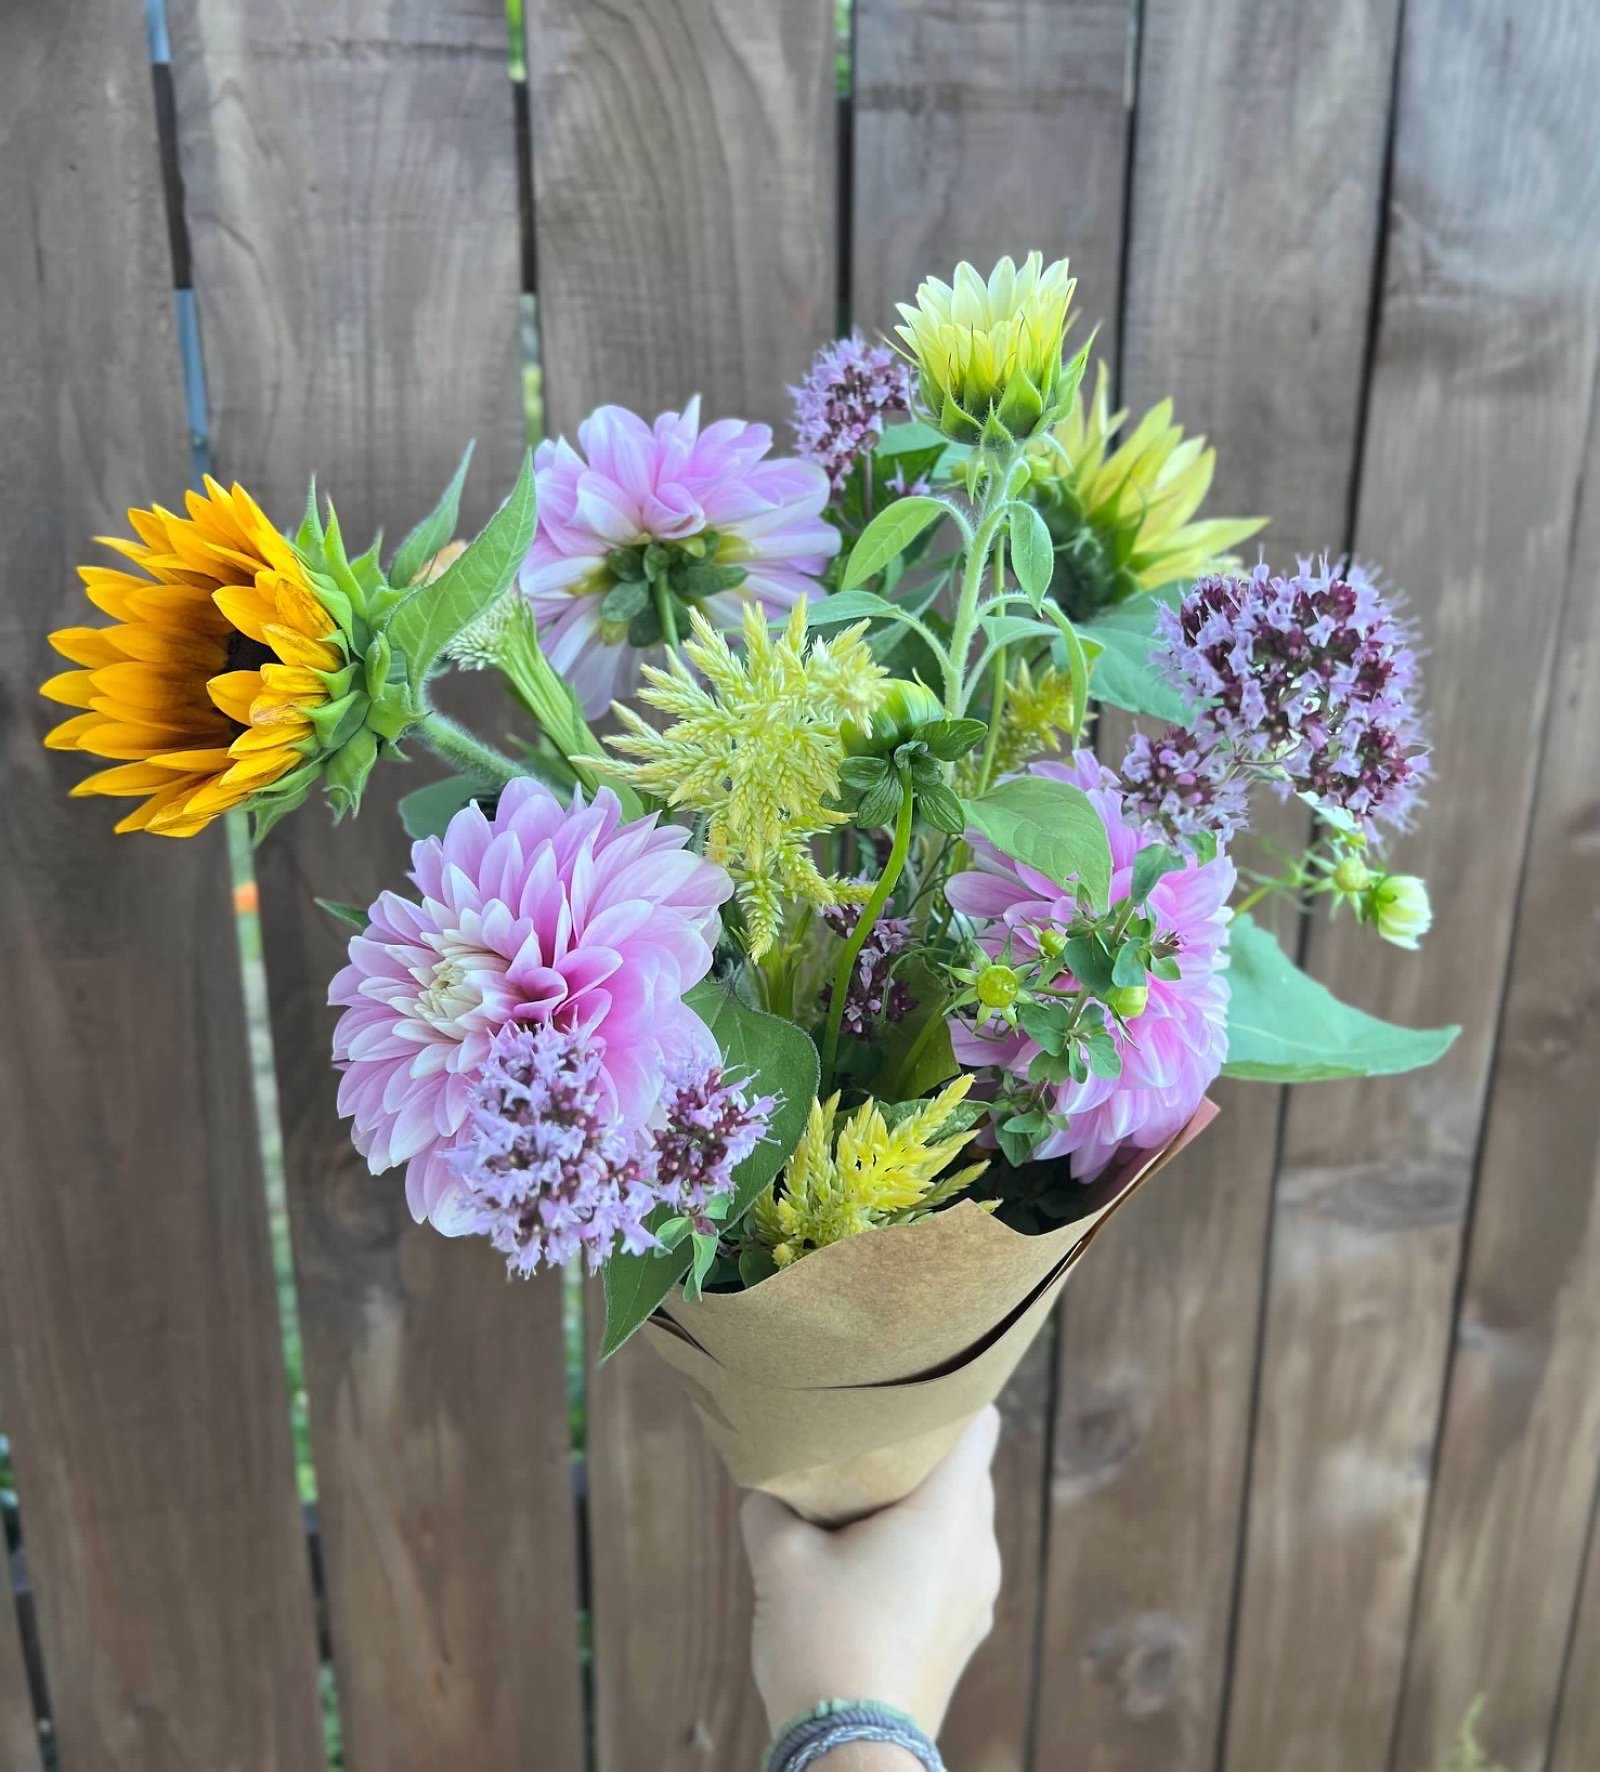
How To Make a Dreamy Arrangement
Arranging flowers sounds fun and relaxing until you gather some beauties and get overwhelmed with where to start! I have some simple tips to help you get the ball rolling and make your beautiful flowers shine in the way they were meant to!
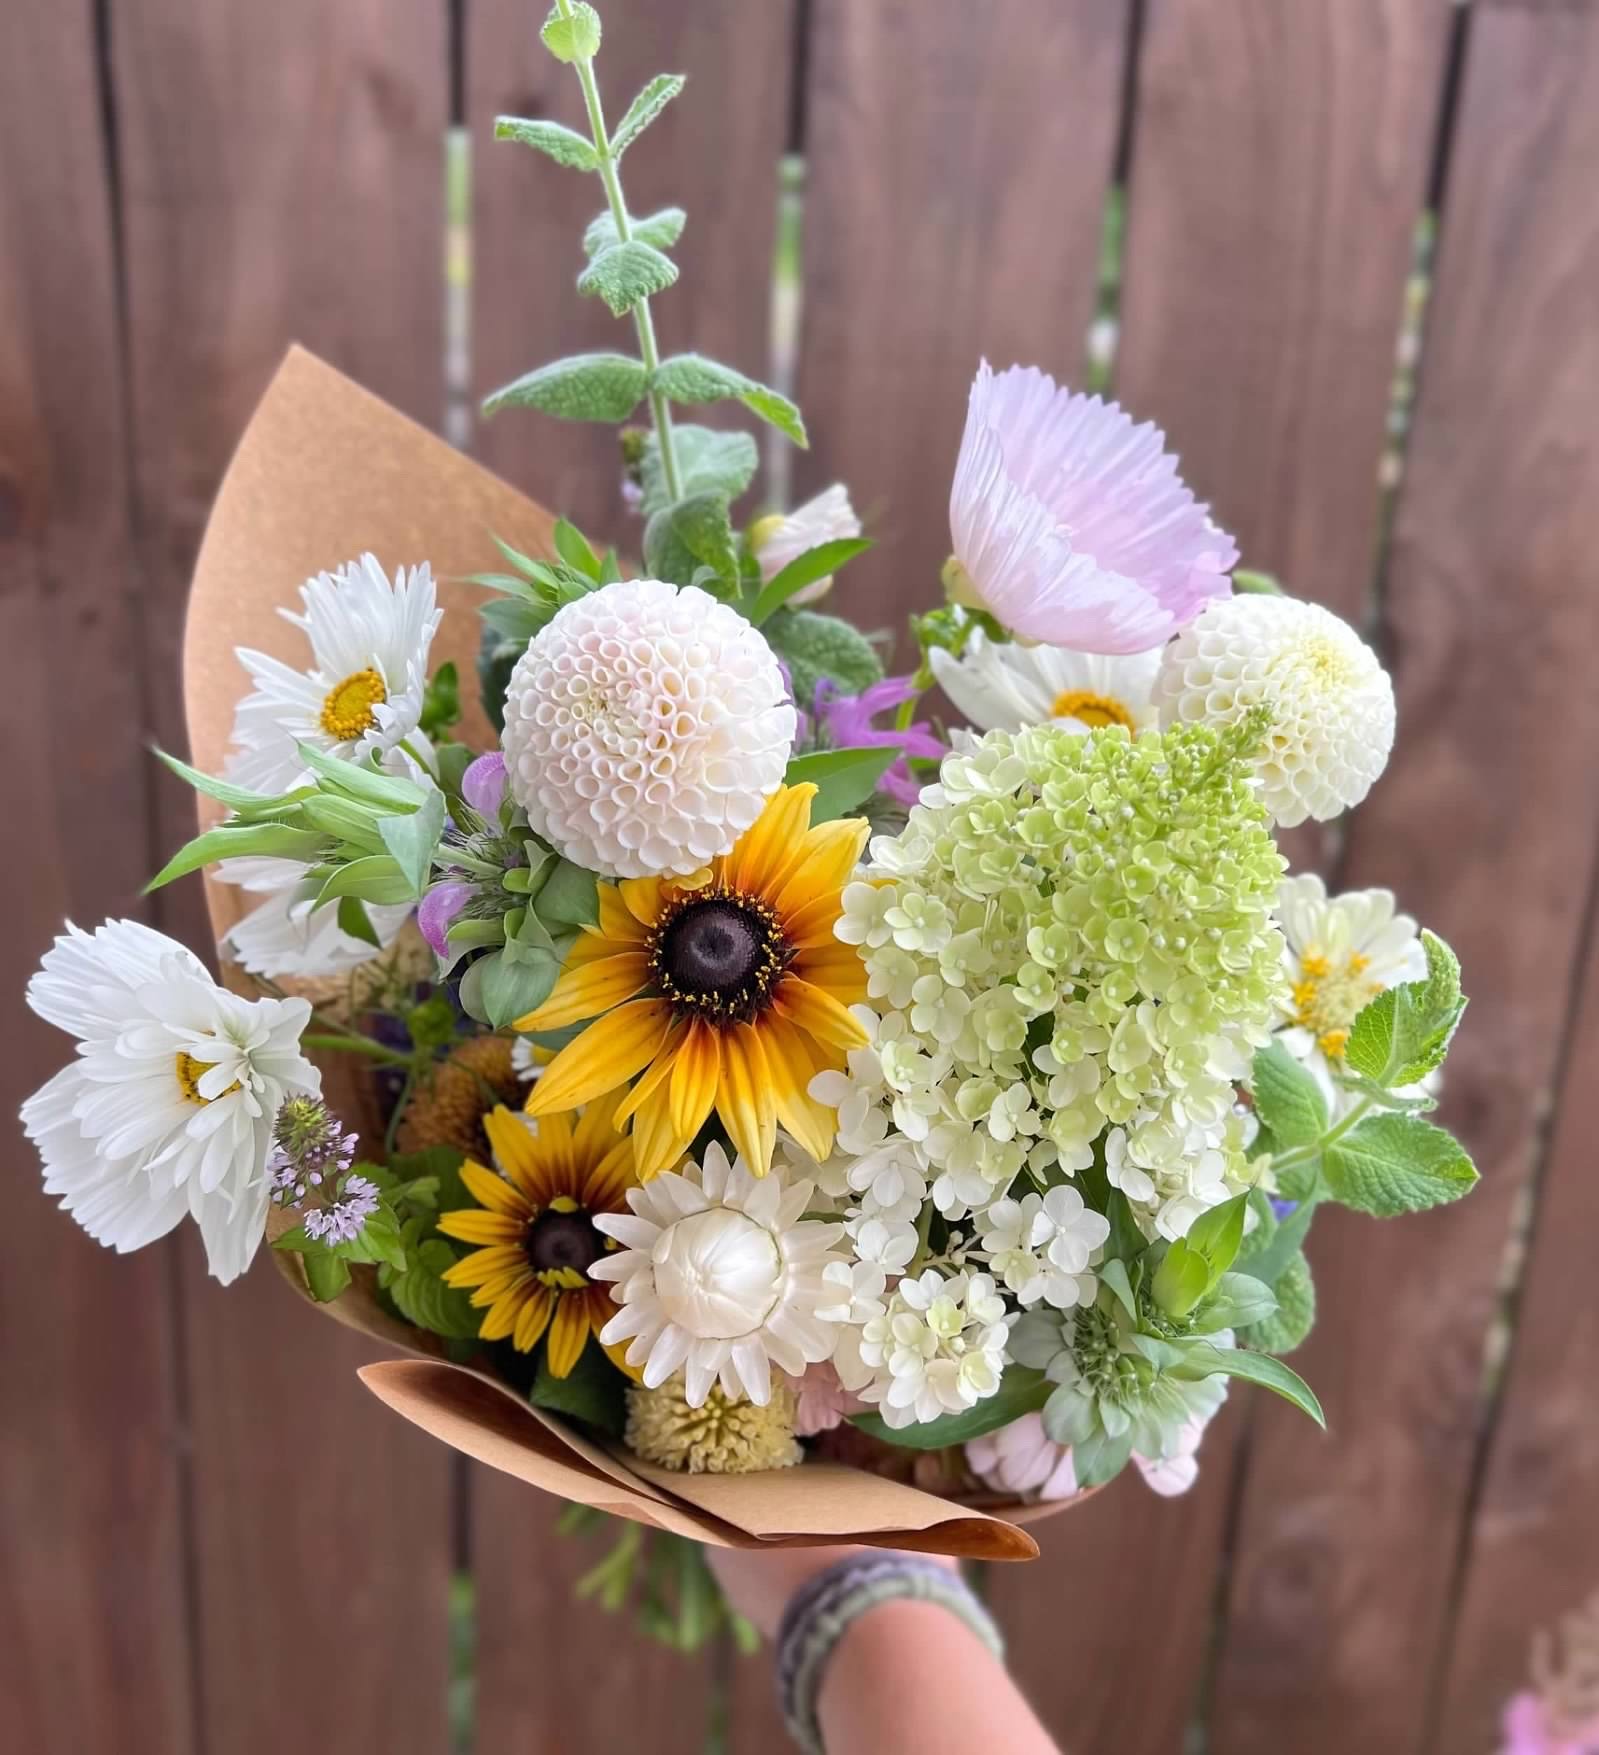
Tip 1: Have a mix of textures, shapes, and sizes.
Unless you are making a bouquet from a straight bunch of flowers (ie: a dozen roses), it’s helpful to have a mix of textures, shapes, and sizes to create interest, texture, and depth to your arrangement.
Tip 2: Start with a focal, a filler, a spike and a foliage. While these are not required to have a beautiful arrangement, I find that bouquets with these 4 types of ingredients are always my favorite! A focal flower is your feature flower (such as ranunculus, peonies, sunflowers, and dahlias). A filler flower is another flower type that will complement your focal (such as zinnias, cosmos, feverfew, and rudbeckia). A spike flower is a flower that has multiple flowers on a single stem one stacked on the next (such as snapdragon, larkspur, and delphinium). A foliage is any type of green leafy stem (such as varieties of mint, shrubs, and eucalyptus). If you don’t have all of these components, don’t worry! You can still make an incredible arrangement if you’re missing one.
Tip 3: Design with odd numbers. Using an odd number of each ingredient helps to create balance throughout your arrangement. For example, 3 focal blooms, 5 filler blooms, 5 spike flowers, and 3 foliage.
Tip 4: Vary the heights of your ingredients. For example, if you have 3 focal stems do not place them all at the same height. Have one high, one mid, and one low in your arrangement.
Tip 5: Don’t add too much color. Try to stick to 1-3 colors in your arrangement. I like to choose one primary color and 1-2 accent colors that complement the primary color of the arrangement.
Tip 6: Start with the foliage. I find it is always easiest for me to start with at least one stem of foliage and then build around that.
Tip 7: Make your arrangement taller than you think. Ideally, you want the height of your arrangement to be 1.5x the height of your vase. You can put together a beautiful blend of flowers, but if they’re just peeking above the throat of the vase, they don’t shine to their full potential.
Tip 8: Don’t sweat it! Flowers are meant to bring joy and peace. If you are stressing over making the perfect arrangement following all of “the rules” then you’re missing the point. The more you practice, the more naturally it becomes and then arranging flowers is a relaxing and happy part of your week!
I hope these tips help give you the confidence to get started when you find yourself with a garden full of flowers screaming to come inside!
Please reach out with any other arranging questions you may have, I’d love to help!
Shelby
Are You Frustrated With Your Bouquets Dying?
Are You Frustrated Your Bouquets are Dying Prematurely?
How frustrating is it when you find the most beautiful bouquet only to bring it home and have it die in a matter of a few days? You spent your hard earned money only to be frustrated rather than full of joy!
There are several things that could be happening to cause this. Read below to see if you’ve ever made any of these common mistakes.
Refresh the water every 1-2 days.
Flowers need fresh water so that bacteria does not build up, make it murky and inhibit water uptake. Some flowers are considered “dirty flowers” meaning they tend to increase the bacteria production in water more quickly. Some of these “dirty flowers” are zinnias, feverfew, rudbeckia, and sunflowers. If these are in your bouquet, it’s even more important to change the water regularly.
Make sure your vase is clean (like really clean!)
Along with changing out the water, it is important to start with a very clean vase— clean enough to drink out of! If your vase has a little bit of dust or grime in it, vase life may be compromised because the particles can inhibit water uptake in the stem.
Remove any foliage below the water line.
Leaves or other plant material below the water line will also make the water less pure. As the foliage breaks down in the water, it becomes grimey. Remove all leaves that will sit below the water line.
Keep them out of direct sunlight and away from ripening fruit.
Fresh flowers placed in direct sunlight will wilt faster than flowers placed in indirect light. They may be beautiful in that bright sunny windowsill, but just know they may not last as long. Also make sure it is not right next to ripening fruits. Ripening fruit emits ethylene which will cause your flowers to die faster as well.
Give them a fresh trim.
Cut flowers also benefit from a fresh trim every few days. This will enhance water uptake as the fresh cut opens up the pores of the stem to receive water more effectively again. This is not necessary to do daily, but every few days is beneficial. You don’t need to cut inches off with each trim, just a little off the end will freshen them up!
Select flowers with a longer vase life.
Lastly, all of these tips help to extend the vase life of your flowers, but some flowers just last longer than others! Some long lasting flowers include ranunculus, tulips, lisianthus, and chrysanthemums. Some flowers that have a shorter vase life include poppies, dahlias, and cosmos. If purchasing flowers from me, feel free to ask how long you can expect your flowers to last!
Buy local flowers.
Local flowers are the freshest you can find! Ones that are commercially grown are not only sprayed with chemicals, but are also harvested many days before you purchase them in order to get them to you.
I hope you found these tips helpful and you get the most joy possible out of your bouquets!
I’d be happy to answer any other questions you may have!
Shelby
My Favorite Summer Products
With the weather warming up, I thought it may be fun to share some of my favorite personal products I use throughout the growing season. To be clear, I do not make any commissions off of any of these products. They are just products that I really enjoy and think you may find make your summer a little bit better as well! I will link them below so that it’s easier for you to find them as well as include photos I’ve taken from their websites for visuals.
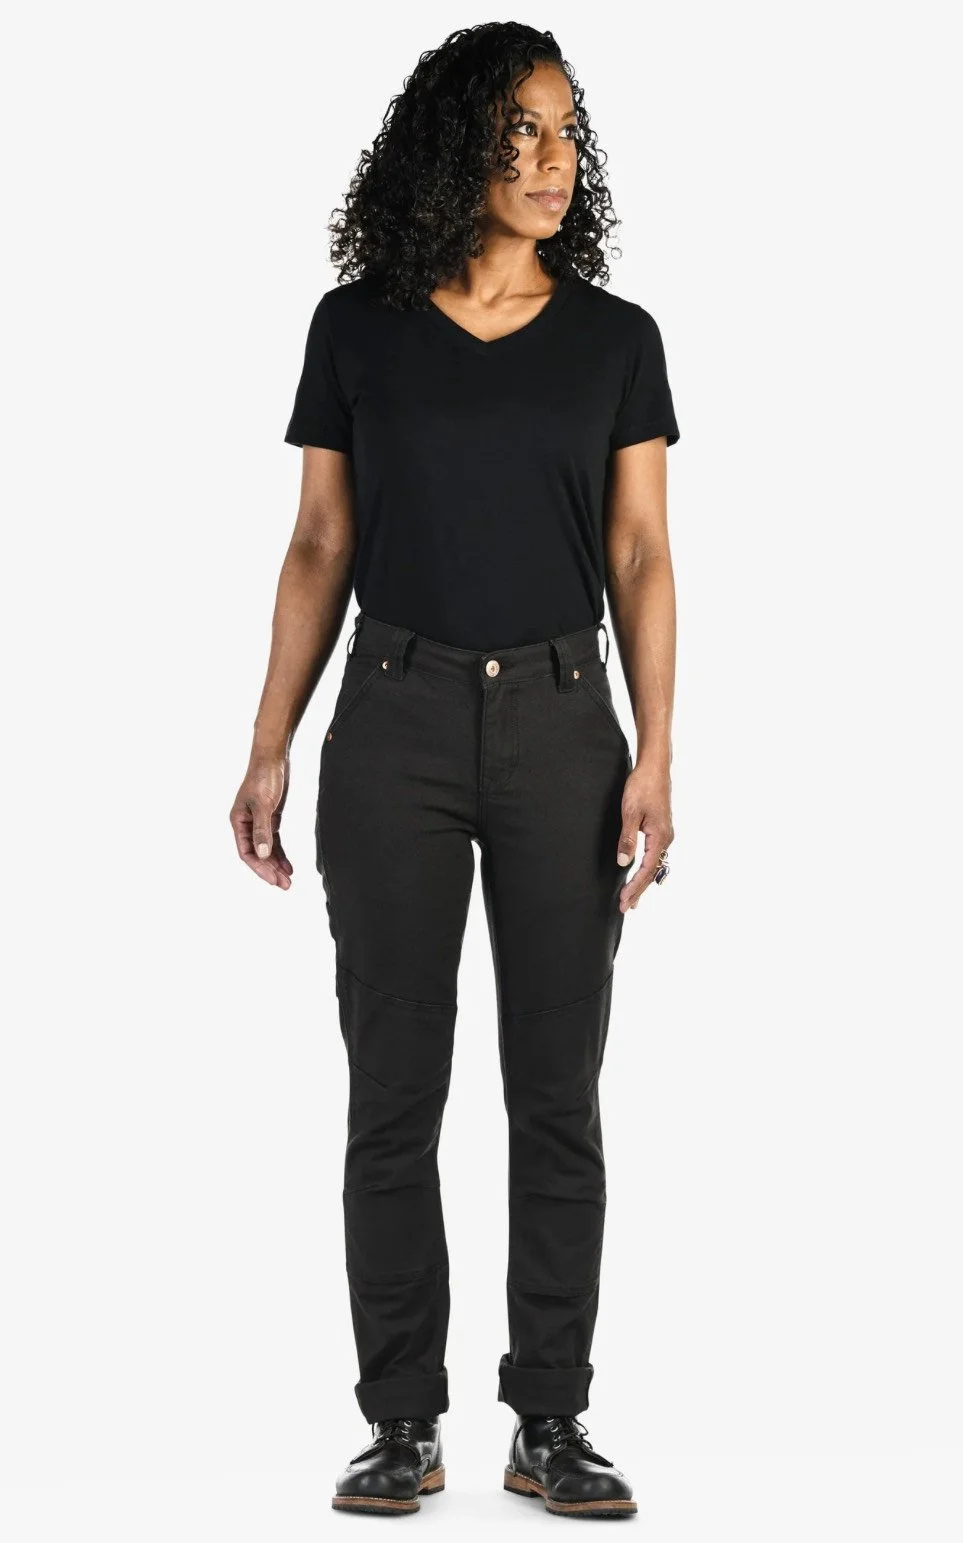
Dovetail pants. https://dovetailworkwear.com/collections/pants/products/go-to-carbon-black-stretch-canvas-pants-womens
These are the best work pants I’ve ever purchased. They are so flexible which allows me to comfortably bend and squat while working. They’re durable and have so many pockets to store things in, so I don’t lose my snips as often!

G4 Free UV protection long sleeves. https://a.co/d/ie504zf
These long sleeve tops are light weight, soft and have UV protection keeping your skin safe in the scorching sun. The tulip hem at the bottom gives you coverage when bending over and also keeps the shirt loose and breezy.
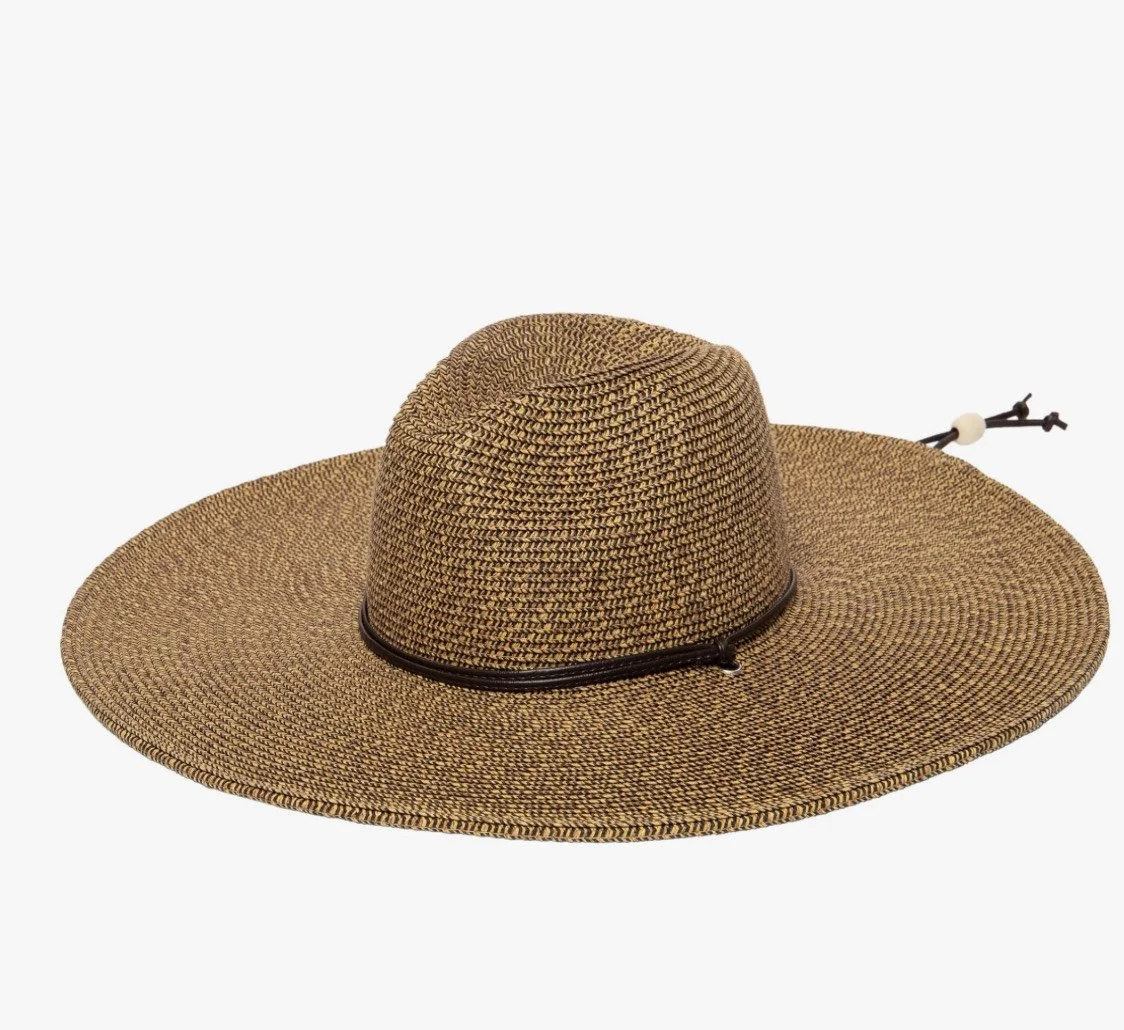
Sandiego Hat Co wide brim hat. https://a.co/d/aAy243G
This hat gives you plenty of face and neck coverage when you’re going to be outside for extended periods of time and don’t want to rely on sunscreen alone. I have very fair skin so even with sunscreen I can get a bad sunburn so I try to wear hats often.

COOLA Organic spray sunscreen. https://coola.com/products/classic-body-organic-sunscreen-spray-spf-50-fragrance-free?_pos=1&_sid=54e46a08c&_ss=r
I find that spray sunscreen for my arms and legs keeps me more consistent with application because it doesn’t take me as long to put it on when I’m in a rush to get out to work. A lot of spray sunscreens feel greasy and like there’s a film sitting on top your skin. This sunscreen blends into my skin pretty well so I don’t mind having this on all summer long. If you’re local to me, I’ve oftentimes found this discounted at Marshalls!

Elta MD face sunscreen. https://eltamd.com/collections/sun-care/products/uv-clear-broad-spectrum-spf-46?_gl=1*bbqxid*_up*MQ..*_gs*MQ..&gclid=CjwKCAiAh6y9BhBREiwApBLHC5y2t3JGum1p3yZZU_LTONieXKbaHzQwDI8Vcs92xM9EIagRAfAqJxoC8fkQAvD_BwE&gclsrc=aw.ds
I have extremely sensitive skin and have tried dozens of sunscreen brands only to have my face break out. My dermatologist recommended Elta sunscreen a few years back and I’ve used it exclusively on my face ever since. It soaks into my skin quickly and does not cause any skin irritation whatsoever.

Raycon ear buds. https://rayconglobal.com/collections/earbuds/products/the-everyday-earbuds
I find these ear buds to be a good substitute for airpods. They work great and the soft earpiece is more comfortable and stays in my ears longer so I can easily listen to music or the latest podcast while gardening. Plus they’re cheaper than airpods which gives you more money to buy flowers!

Corona Flower Snips. https://a.co/d/b17RYjm
It’s hard to find flower snips you truly love. Last year I came across this brand and have since purchased an additional 3 pairs! They’re affordable and they work great. Make sure to keep reading to find out how to keep these working well for you all season!
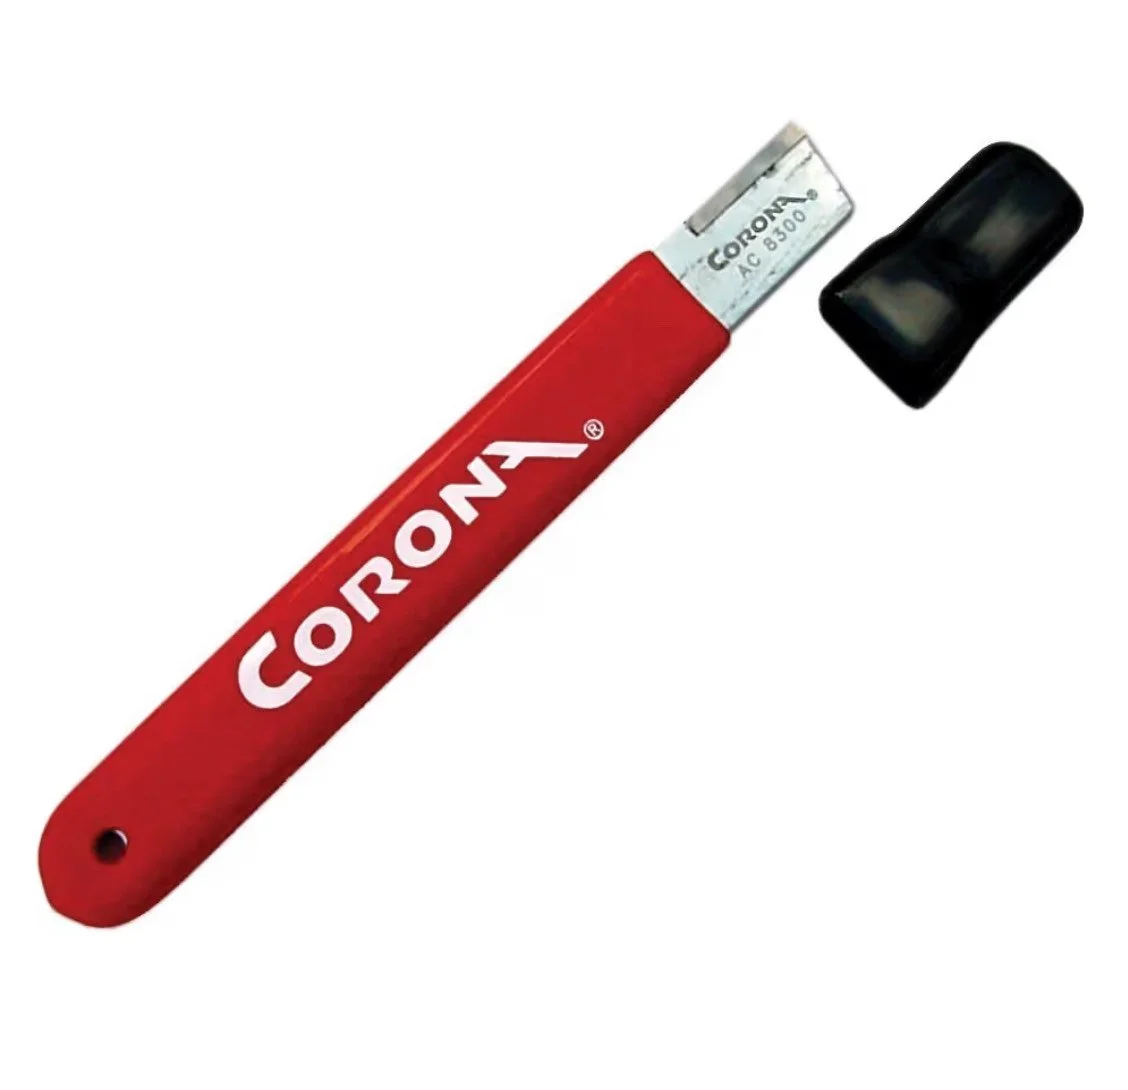
Corona Snip Sharpener. https://a.co/d/6hUHkLD
For under $10 you can keep your snips sharp all season! They dull with repetitive use so I find that sharpening my tools weekly (it takes less than one minute to do it), keeps them cutting cleanly all season.
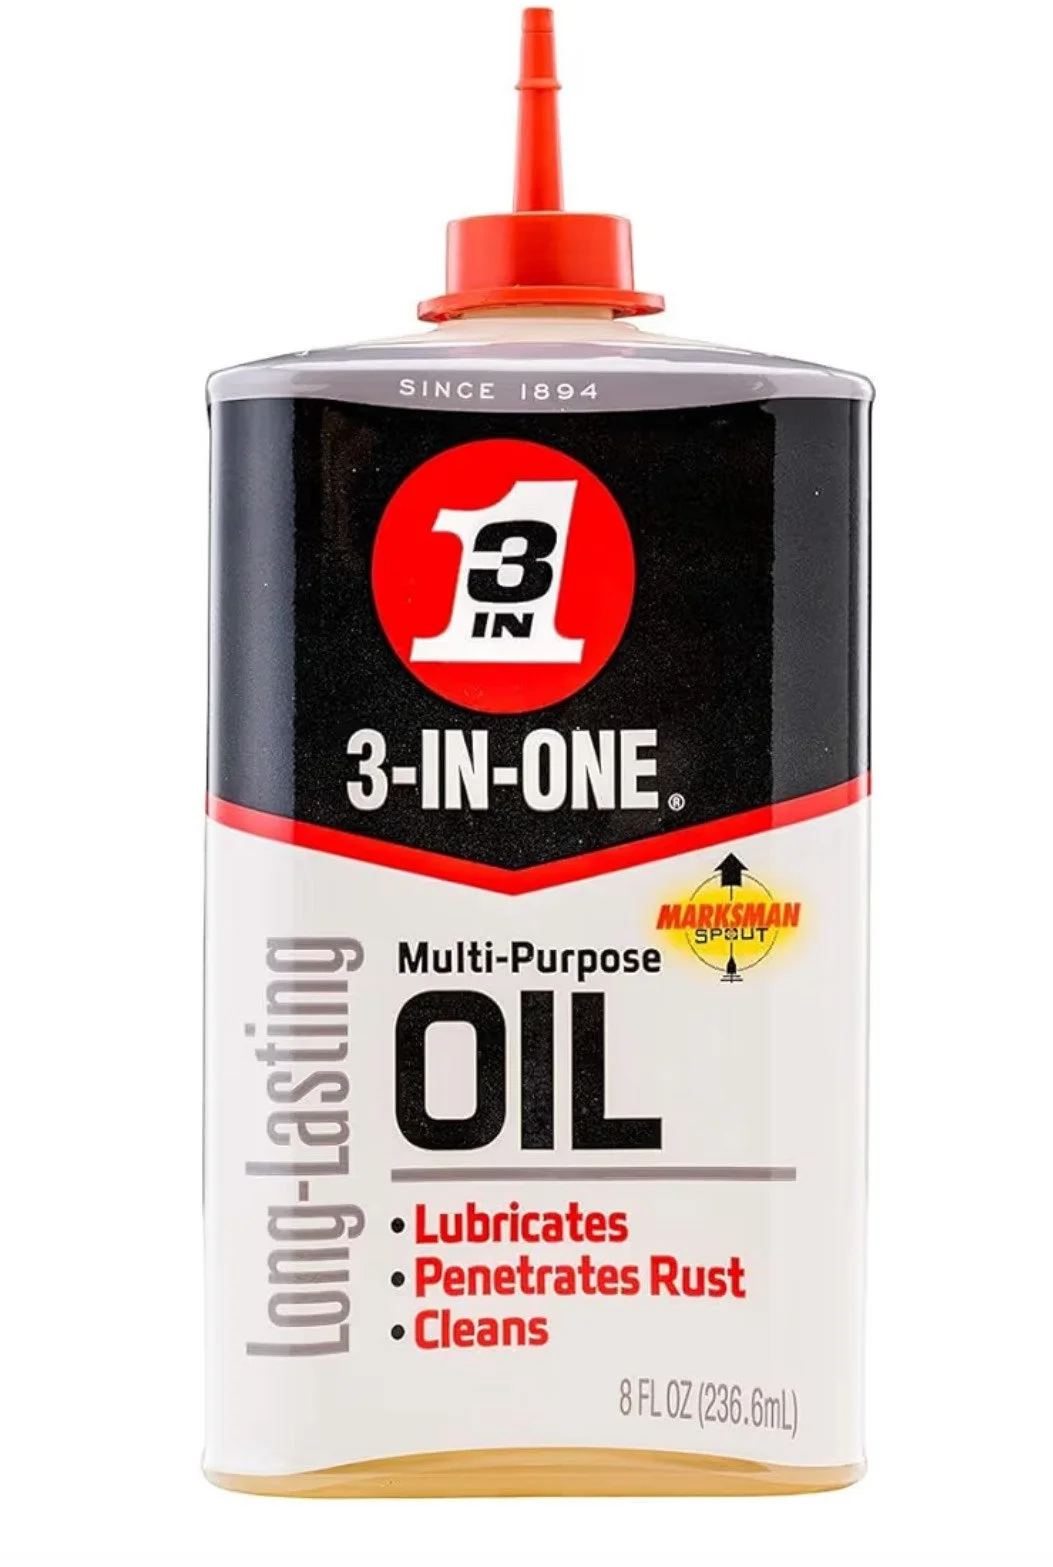
3 in One Oil. https://a.co/d/7TPNBP0
Along with sharpening my tools, I use this oil every month or so. This keeps the joints moving fluidly and makes it so that they do not seize up or catch during use.
I hope that you’ve found some helpful ideas to make your time spent outside in the garden more enjoyable this year!
Shelby

The Benefits Of Cut Flowers
Of course I come from a biased position as an extreme flower lover- I have built my life around those dreamy little things! However, there are numerous benefits to having cut flowers in your home. There’s even scientific proof! It has been studied at Harvard University, Texas A&M University, and several others. I’d love to share some of the positive things flowers can do for you!
Flowers can provide a boost of energy and enthusiasm. Who doesn’t need that when at home with littles who suck every bit of energy out of your bones some days.
Flowers can help improve mood. Think of a time you have felt down. Maybe it was something small like gloomy, nasty weather or maybe something big like a heartbreak. If flowers were to magically show up at your door during that down time, think of how that may have made you feel.
Flowers inspire creativity. I mean how can they not?! They’re little works of art gifted to us by nature! The complexity of their petal structure, the depth of color, the fun whimsy of cosmos and the elegance of a full petaled garden rose. You can’t look at flowers without feeling something.
Flowers are a decoration you never have to dust. AND you don’t have to pack them away in storage when you’re totally over that style. They are a great way to freshen up a space without having to commit to something long term.
Local flowers are grounding. I know I’m biased, again but one of the incredible things about local flowers to me is that they are a great reminder that there is a season for everything. Do you want local tulips in October- you can’t have them. What about local dahlias in March? Dream on! While some can see that as a negative, I see it as a beautiful reminder that there is a optimal season for everything- in flowers and in life. You must exercise your patience, their time (and your time) is coming- and it will be magnificent.
And lastly, There is never an inappropriate time for flowers! Whether it is a thank you gift, a condolence, a brand new baby, or a house warming gift- flowers are always welcome and appropriate to gift!
How have flowers made you feel? I’d love to hear about your experience with flowers!
Shelby
Of course I come from a biased position as an extreme flower lover- I have built my life around those dreamy little things! However, there are numerous benefits to having cut flowers in your home. There’s even scientific proof! It has been studied at Harvard University, Texas A&M University, and several others. I’d love to share some of the positive things flowers can do for you!
Flowers can provide a boost of energy and enthusiasm. Don’t we all need a little more energy in life when it feels like we are constantly being pulled in different directions?
Flowers can help improve mood. I can tell you I’ve never looked at a beautiful bouquet and felt angry or sad!
Flowers inspire creativity. I mean how can they not?! They’re little works of art gifted to us by nature! The complexity of their petal structure, the depth of color, the fun whimsy of cosmos and the elegance of a super ruffly garden rose. I could go on and on!
Flowers are a decoration you never have to dust. AND you don’t have to pack them away in storage when you’re over that style. They are a great way to freshen up a space without having to commit to something long term.
Local flowers are grounding. One of the most incredible things about local flowers is that they are a great reminder that there is a season for everything. Do you want local tulips in October- you can’t have them. What about local dahlias in March? Dream on! While some can see that as a negative, I see it as a beautiful reminder that life is ever changing and there’s beauty in each season. Flowers remind you to live in the present and enjoy the beauty while we have it. Isn’t that part of what makes them great? They don’t last forever, so we cherish them.
And lastly, There is never an inappropriate time for flowers! Whether it is a thank you, a condolence, welcoming a new baby, or a house warming gift- flowers are always a welcome and appropriate gift! I’ve never seen someone frown when receiving flowers!
How have flowers made you feel? Have you noticed some of the benefits I listed above? I’d love to hear about your experience with flowers!
Shelby


The Benefits of Gardening With Kids
Gardening is a broad term that covers something as large as acres of land to growing a few things in a pot on your patio. No matter what gardening looks like for your family, your kids can learn some very important life lessons!
Lesson 1: The seasons in weather and how there is a season for everything in life.
Depending on the age of your child, this can be something as simple as learning Spring, Summer, Fall, and Winter and what the weather is like in those seasons. If your child is a bit older, you can teach them about the deeper association of how there is a season for everything in life. For summer flowers, spring is meant for growing, summer for thriving, fall for winding down, and winter for resting. In life we go through these same types of seasons.
Lesson 2: How to care for something else.
Your child learns how to put the needs of something else above the needs of themselves. They get to reap the benefits of that care by enjoying the blooms of their flowers, or the delicious produce that comes from their plants.
Lesson 3: A plant’s basic needs are much like our own- water, sun, nutrition.
They can learn a bit about themselves as they care for the needs of their garden. Adequate water, adequate sunlight/time outdoors, and adequate nutrition are all essentials for not only surviving, but thriving! Kids can’t grow without proper nutrition and they can’t run and play without fueling their body.
Lesson 4: How to work hard.
If you’ve ever grown something you know it's not always easy! If you have a lot of space, there’s the physical labor of hauling dirt in wheelbarrows to your flower beds, digging holes, and pulling weeds. Even if you have a patio garden, there’s still plenty of work in hauling bags of soil, pulling weeds, moving around pots, etc. Nothing in life comes without a little hard work. And that’s the best part of it all, right? The reward is so much sweeter after a bit of hard work!
Lesson 5: Pollinators and Pests.
When tending to a garden, you’ll see both pollinators and pests. They are both an important part of our ecosystem. As long as the ecosystem is in balance, there is harmony in the garden.
You can teach your child about what the pollinators do for plants and why we need to invite them. You can look for ways to create a habitat for them to thrive. They will also learn about pests, what they look like, and the relationship they have with our garden. You can teach them about predatory insects and how they protect our plants from having too many pests in the garden. For example, ladybugs help keep our ecosystem balanced by eating aphids.
There are many more lessons kids learn when gardening, but these key points are so helpful in your child’s overall development and understanding of the world around them. I’d encourage you to start a garden- no matter how small!
I also have a Kid’s Cut Flower Garden Class coming up if you want something fun to do with the family! You can find details on my website under ‘Workshops.’
I’d love to help your family get started in your gardening journey!
Shelby
Finn harvesting a bouquet for himself


Joey with a flower bigger than his head


Dahlias, Dahlias, DAHLIAS!
If you’ve grown them, you love them.
And if you haven’t, well, buckle up for your next obsession!
Hide the credit card! Somehow everyone who has begun growing dahlias can’t seem to get enough of them and will spend whatever they need to in order to get that one variety they’ve suddenly fallen in love with (myself included).
If you are new to dahlias, I’d love to share some of my successes (and more importantly, some of my failures) to help you become a pro in no time.
Lesson 1: Soil health is extremely important when growing dahlias. My first year growing, I started with life-less, nutritionally off-balanced sticky, nasty clay soil. My dahlias did TERRIBLE! Not only did they grow extremely slowly and give me just a few blooms, they also had every pest known to man feasting on them! Early that year I sent off a soil sample and amended accordingly prior to planting (as well as added several inches of compost). However, soil amendments unfortunately don’t work immediately. So in that first year, I limped the dahlias along just praying they’d survive and give me a few tubers for the following year (spoiler- they did! The obsession continued).
Lesson 2: Pests are common with dahlias and are good at spreading disease (which dahlias are known for). Common pests that dahlias face include slugs, aphids, thrips, spider mites, cucumber beetles, japanese beetles, mealybugs, and white flies. I’ve dealt with them all (except for japanese beetles) to varying degrees throughout my 5+ years of growing dahlias seriously.
I’ve tried a variety of pest management solutions and have found good success with organic pest management that focuses on prevention first. I release predatory insects as needed second, and use organic spraying third as a last resort. Personally I’ve landed on this schedule below for this upcoming season (this may or may not work for you, so take this with a grain of salt).
Apply Black Strap Molasses (2T/Gal) twice per month to raise the brix level of my plants which leads to greater pest and disease resistance.
Apply triple threat beneficial nematodes once per month from March-June.
Apply green lacewing eggs once per month from April-August.
Apply minute pirate bugs when I have an outbreak of aphids, thrips, spider mites, mealy bugs or white flies
Spray Captain Jacks Dead Bug Brew as a last resort if an outbreak gets out of control (I was able to avoid this all of last year with the management listed above).
This plan is far from the cheapest form of pest management, but it is the method that I feel good about using. I find that each year that I focus on improving my soil health, decreasing my spraying of any chemicals (even organic ones), and releasing predators, my inputs decrease more and more. I am hopeful that this coming year I will primarily utilize molasses, beneficial nematodes, and green lacewing eggs as my pest management/prevention solutions.
Lesson 3: Staking is crucial! I know of quite a few growers who do not stake their plants at all and only have a small percentage flop to the ground. I also know of even more growers who utilize the corralling method with great success (which is a more minimal amount of support). That has also not been my experience. This past season, I wanted to trial the coralling method. If you are unfamiliar with this method, simply put you use tposts as your support around the outside of your rows and baling twine to make a box around the outside of your dahlias and an x through the middle. They will grow up through this and the twine will give them enough support to keep them upright. I trialed this method last year in an area of my hillside and let me tell you, maybe 10% of my plants stayed upright. It was a total fail! I ended up mid season trying to individually stake some and add hortonova netting to others wherever possible. Now I know, it’s hortonova netting for me which is unfortunate because I have a love/hate relationship with hortonova netting.
Lesson 4: Dial in a watering routine. I listened to a podcast from Jenny Love of No Till Flowers on the power of pulse watering this past winter and I am excited to try that method for myself. Very basically put, I plan to change from my previous schedule of long drip system watering sessions every 2-3 days to watering several times per day for a short duration. I’m going to play around with the scheduling of it all this coming season but I think it will be helpful for me in my dry summertime climate to keep the dahlias with easy access to water without making them soggy all summer. You should definitely listen to her podcast for more info!
I hope you enjoyed hearing about my experiences growing dahlias and hope you’ll continue following our journey as we excitedly enter this upcoming year!
Please reach out with any questions you may have about growing dahlias, I’d love for these flowers to bring you the intense joy you deserve!
Shelby
If you’ve grown them, you love them.
And if you haven’t, well buckle up for your next obsession!
Hide the credit card! Somehow everyone who has begun growing dahlias can’t seem to get enough of them and will spend whatever they need to in order to get that one variety they’ve suddenly fallen in love with (myself included!)
If you are new to dahlias, I’d love to share some of my successes and more importantly, some of my failures to help you become a pro in no time.
Lesson 1: Soil health is extremely important when growing dahlias. My first year growing a cut flower garden, I started with lifeless and nutritionally off-balanced, sticky, nasty clay soil. Not even worms liked my soil! My dahlias did TERRIBLE! Not only did they grow extremely slowly and give me only a few blooms, they also had every pest known to man feasting on them! Early that year I sent off a soil sample and amended accordingly (along with adding compost) before planting my dahlias. However, soil amendments don’t work immediately. So in that first year, I limped the dahlias along just praying they’d survive and give me a few tubers for the following year (spoiler- they did! So the obsession continued).
Lesson 2: Pests are common and can easily spread disease (which dahlias are known for). Common pests that dahlias face include slugs, aphids, thrips, spider mites, cucumber beetles, japanese beetles, mealybugs, and white flies. I’ve dealt with them all (except for japanese beetles) to varying degrees throughout my 5+ years of growing dahlias seriously.
I’ve tried a variety of pest management solutions and have found good success with organic pest management that focuses on prevention first, the release of predatory insects second, and organic spraying third. In my first year, I sprayed organic sprays mainly to manage my pests. And they worked (for a very little bit). I found in order to keep the pests at bay, I needed to spray weekly. Not only did I not want to devote that much time at dusk or dawn spraying (to minimize the effect on beneficials) every week, I did not feel good about spraying weekly.
My goal since the following year, has been to create a natural predator/pest relationship that has me minimally involved. Personally I’ve landed on this schedule below for the upcoming season (this may or may not work for you, so take this with a grain of salt).
Apply Black Strap Molasses (2T/Gal) twice per month to raise the brix level of my plants (check out Jenny Love of No Till Flowers podcast on brix to learn more). Raising brix levels leads to a plant having a greater pest and disease resistance.
Apply triple threat beneficial nematodes once per month from March-June.
Apply green lacewing eggs once per month from April-August.
Apply minute pirate bugs when I have an outbreak of aphids, thrips, spider mites, mealy bugs or white flies.
Spray Captain Jacks Dead Bug Brew as a last resort if an outbreak gets out of control (I was able to avoid this all of last year with the management listed above).
I purchase my benefical predators from Arbico Organics and Nature’s Good Guys. I do not have any sponsorships with them, I just like them.
This plan is far from the cheapest form of pest management, but it is the method that I feel good about using. I aim to not spray any pesticides as that harms beneficial insects as well as the pests you are targeting. In my research, I have not found any spray that does not harm beneficials at all.
I find that each year I focus on improving my soil health, decreasing my spraying of any pesticides (even organic ones), and releasing predators, my inputs decrease more and more. I am hopeful that this coming year I will primarily utilize molasses, beneficial nematodes, and green lacewing eggs as my pest management/prevention solutions.
Lesson 3: Staking is crucial! I know of quite a few growers who do not stake their plants at all and only have a small percentage fall over. I also know of even more growers who utilize the corralling method with great success. Neither of those have been a successful staking method for me. This past season, I wanted to trial the coralling method since I’m not a huge fan of hortonova netting. If you are unfamiliar with this method, you use tposts as your support around the outside of your rows and baling twine to make a box around the outside of your dahlias and an x through the middle. They will grow up through this and the twine will give them enough support to keep them upright. I trialed this method last year in an area of my hillside and let me tell you, maybe 10% of my plants stayed upright. It was a total fail! I now realize my hillside is too steep for lower degrees of support. I ended up mid season trying to individually stake some and add hortonova netting to others wherever possible. Now I know, it’s hortonova netting for me, which is unfortunate because hortonova netting and I have a love/hate relationship. I love it mid season when it is perfectly holding up my plants, but it’s a bit of a pain when it comes to harvesting stems and I hate untangling and installing it. Don’t get me started on removing it!
Lesson 4: Dial in a watering routine. Dahlias need a decent amount of water throughout the growing season (especially if you live somewhere that does not get a lot of rain in the summer like the PNW). They do not like sitting in really wet soil though. The tubers are prone to rotting if they get too much water. So there’s a delicate balance!
I listened to a podcast from Jenny Love of No Till Flowers on the power of pulse watering this past winter and I am excited to try that method for myself. I plan to change from my previous schedule of long, less frequent watering sessions through my drip system to watering several times per day for a short duration. I’m going to play around with the scheduling of it all this upcoming season, but I think it will be helpful for me in my dry summer climate for my plants to have easy access to water without making them soggy all summer. You should definitely listen to her podcast for more info on pulse watering!
I hope you enjoyed hearing about my experiences growing dahlias and hope you’ll continue following our journey as we excitedly enter this upcoming year! Our Dahlia Tuber Sale is coming up very soon!
Our sale is March 8th at 9am for the general public. If you want early access, sign up for our newsletter and you will get an email receiving the password to shop at 8am!
Please reach out with any questions you may have about growing dahlias. I’d love for these flowers to bring you the intense joy you deserve!
Shelby
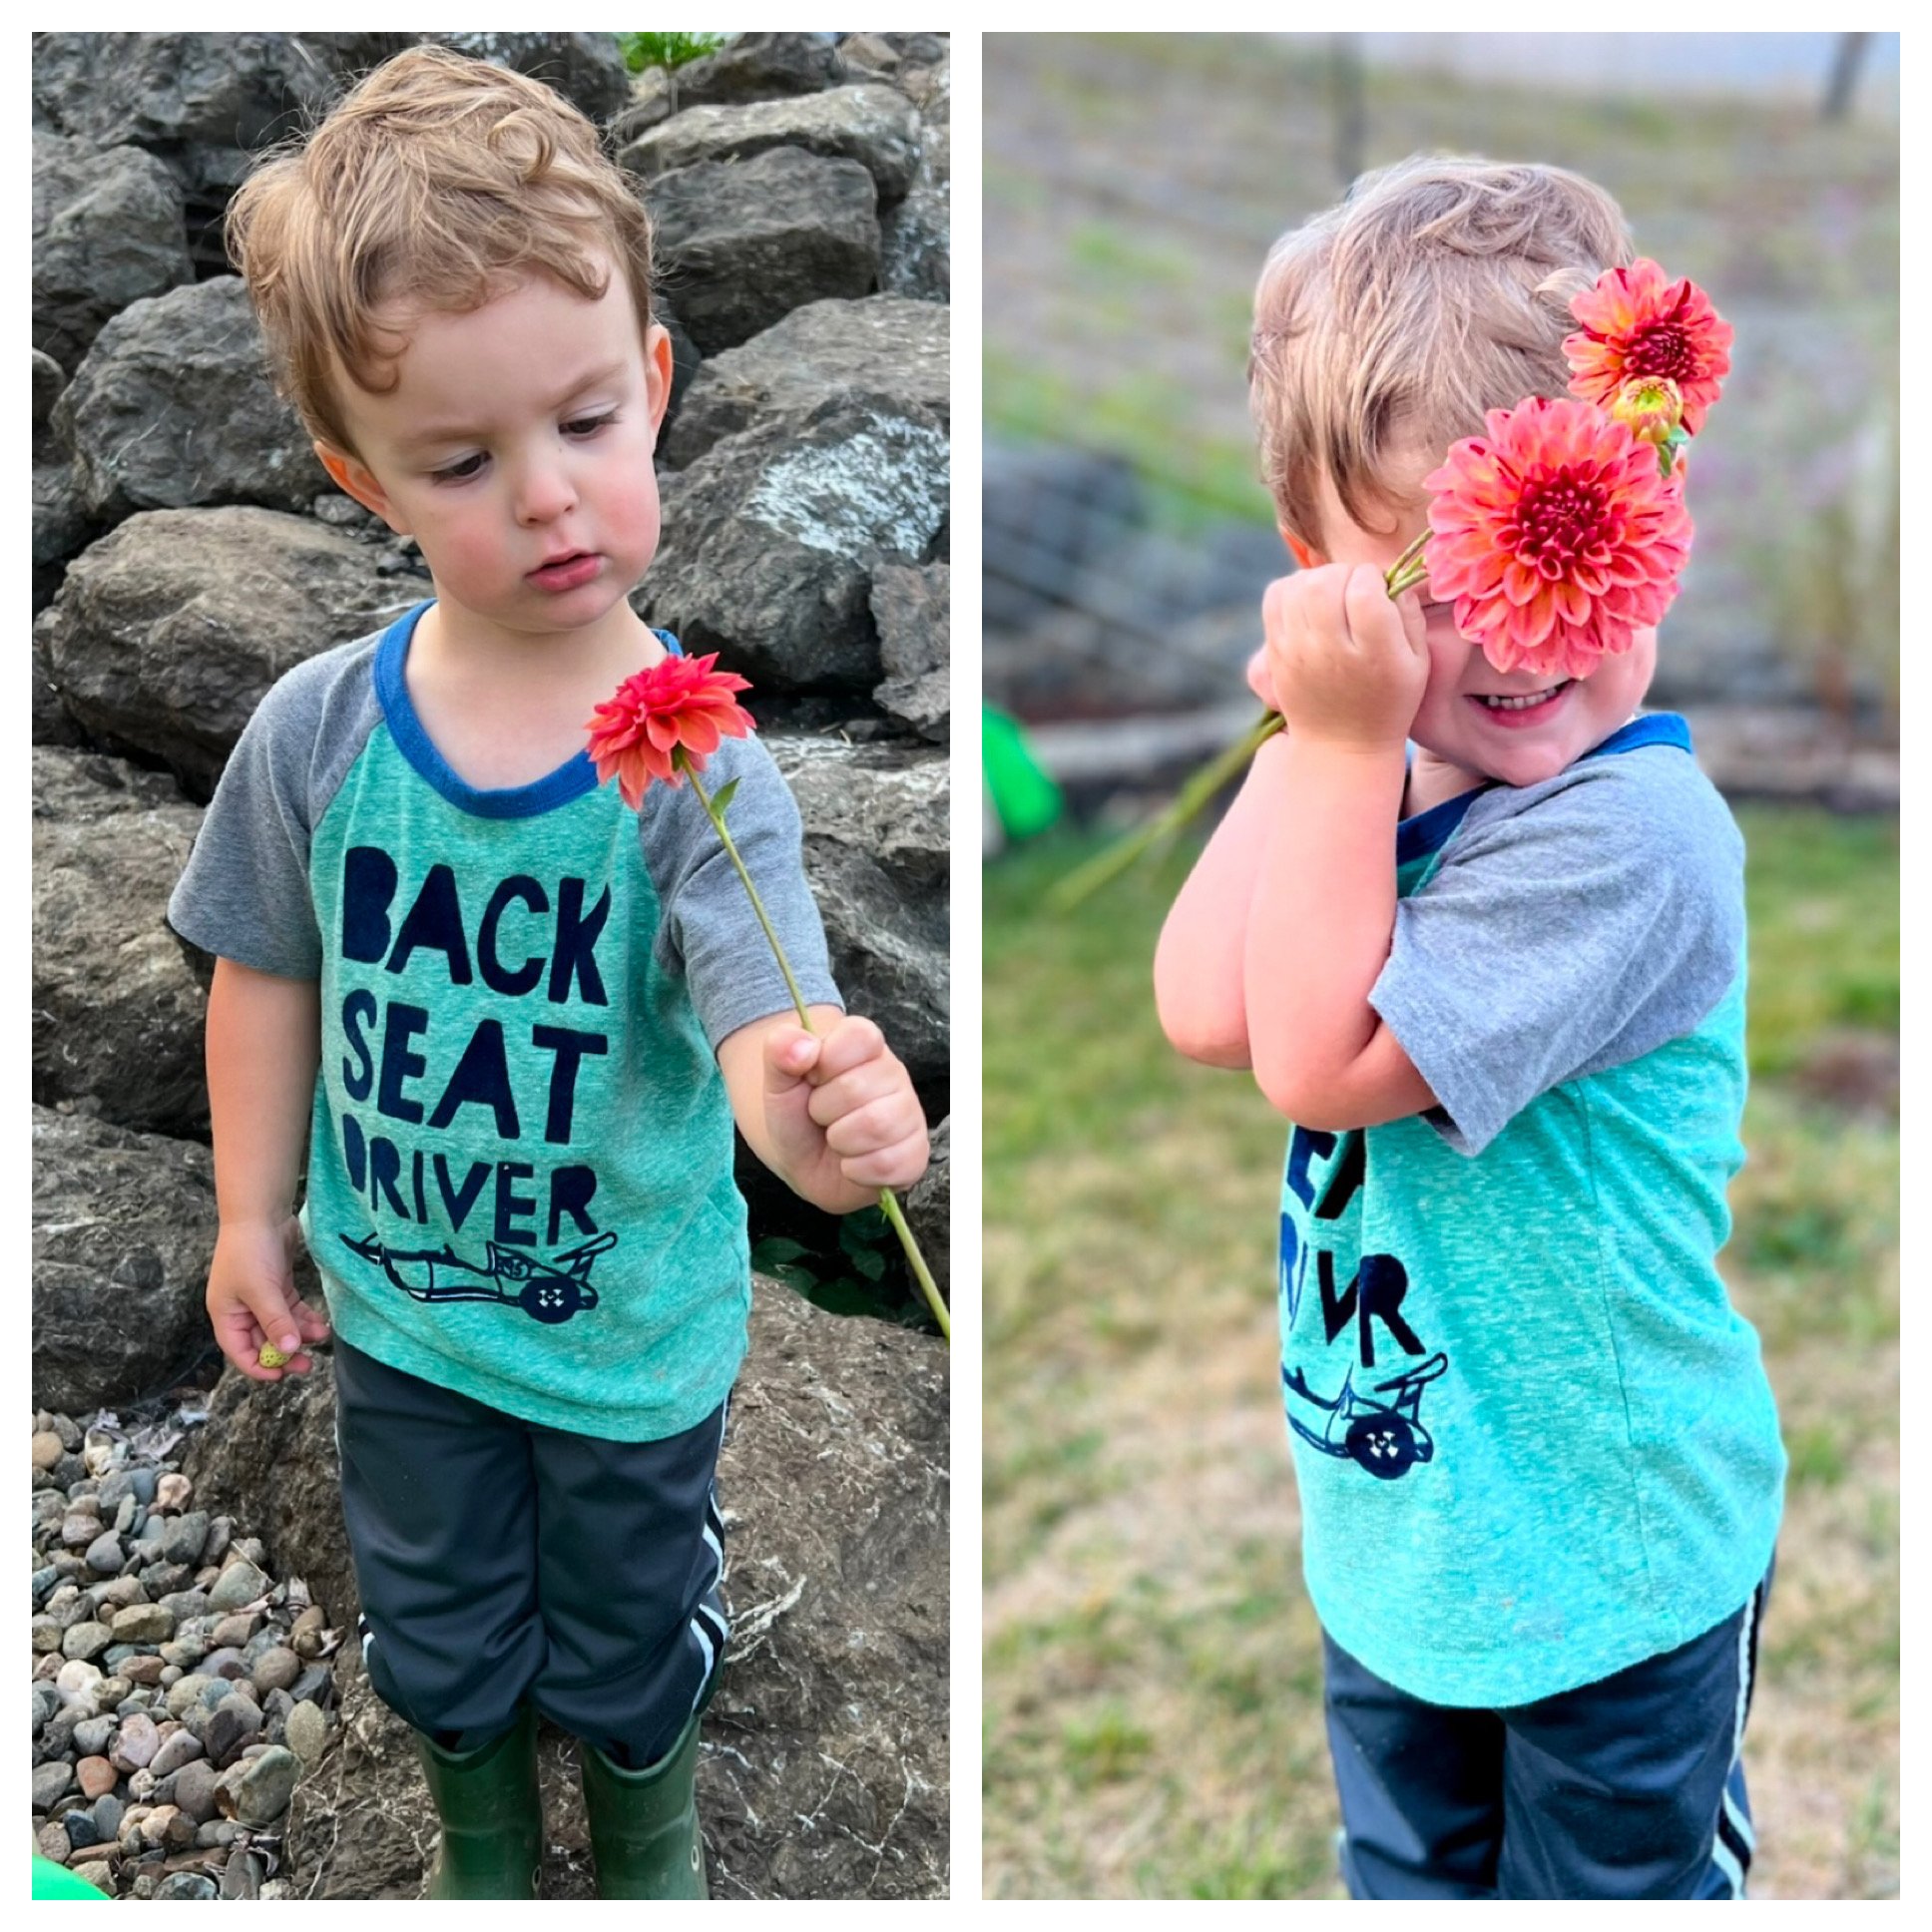
Little 3 year old Finn
RM Summer Haze
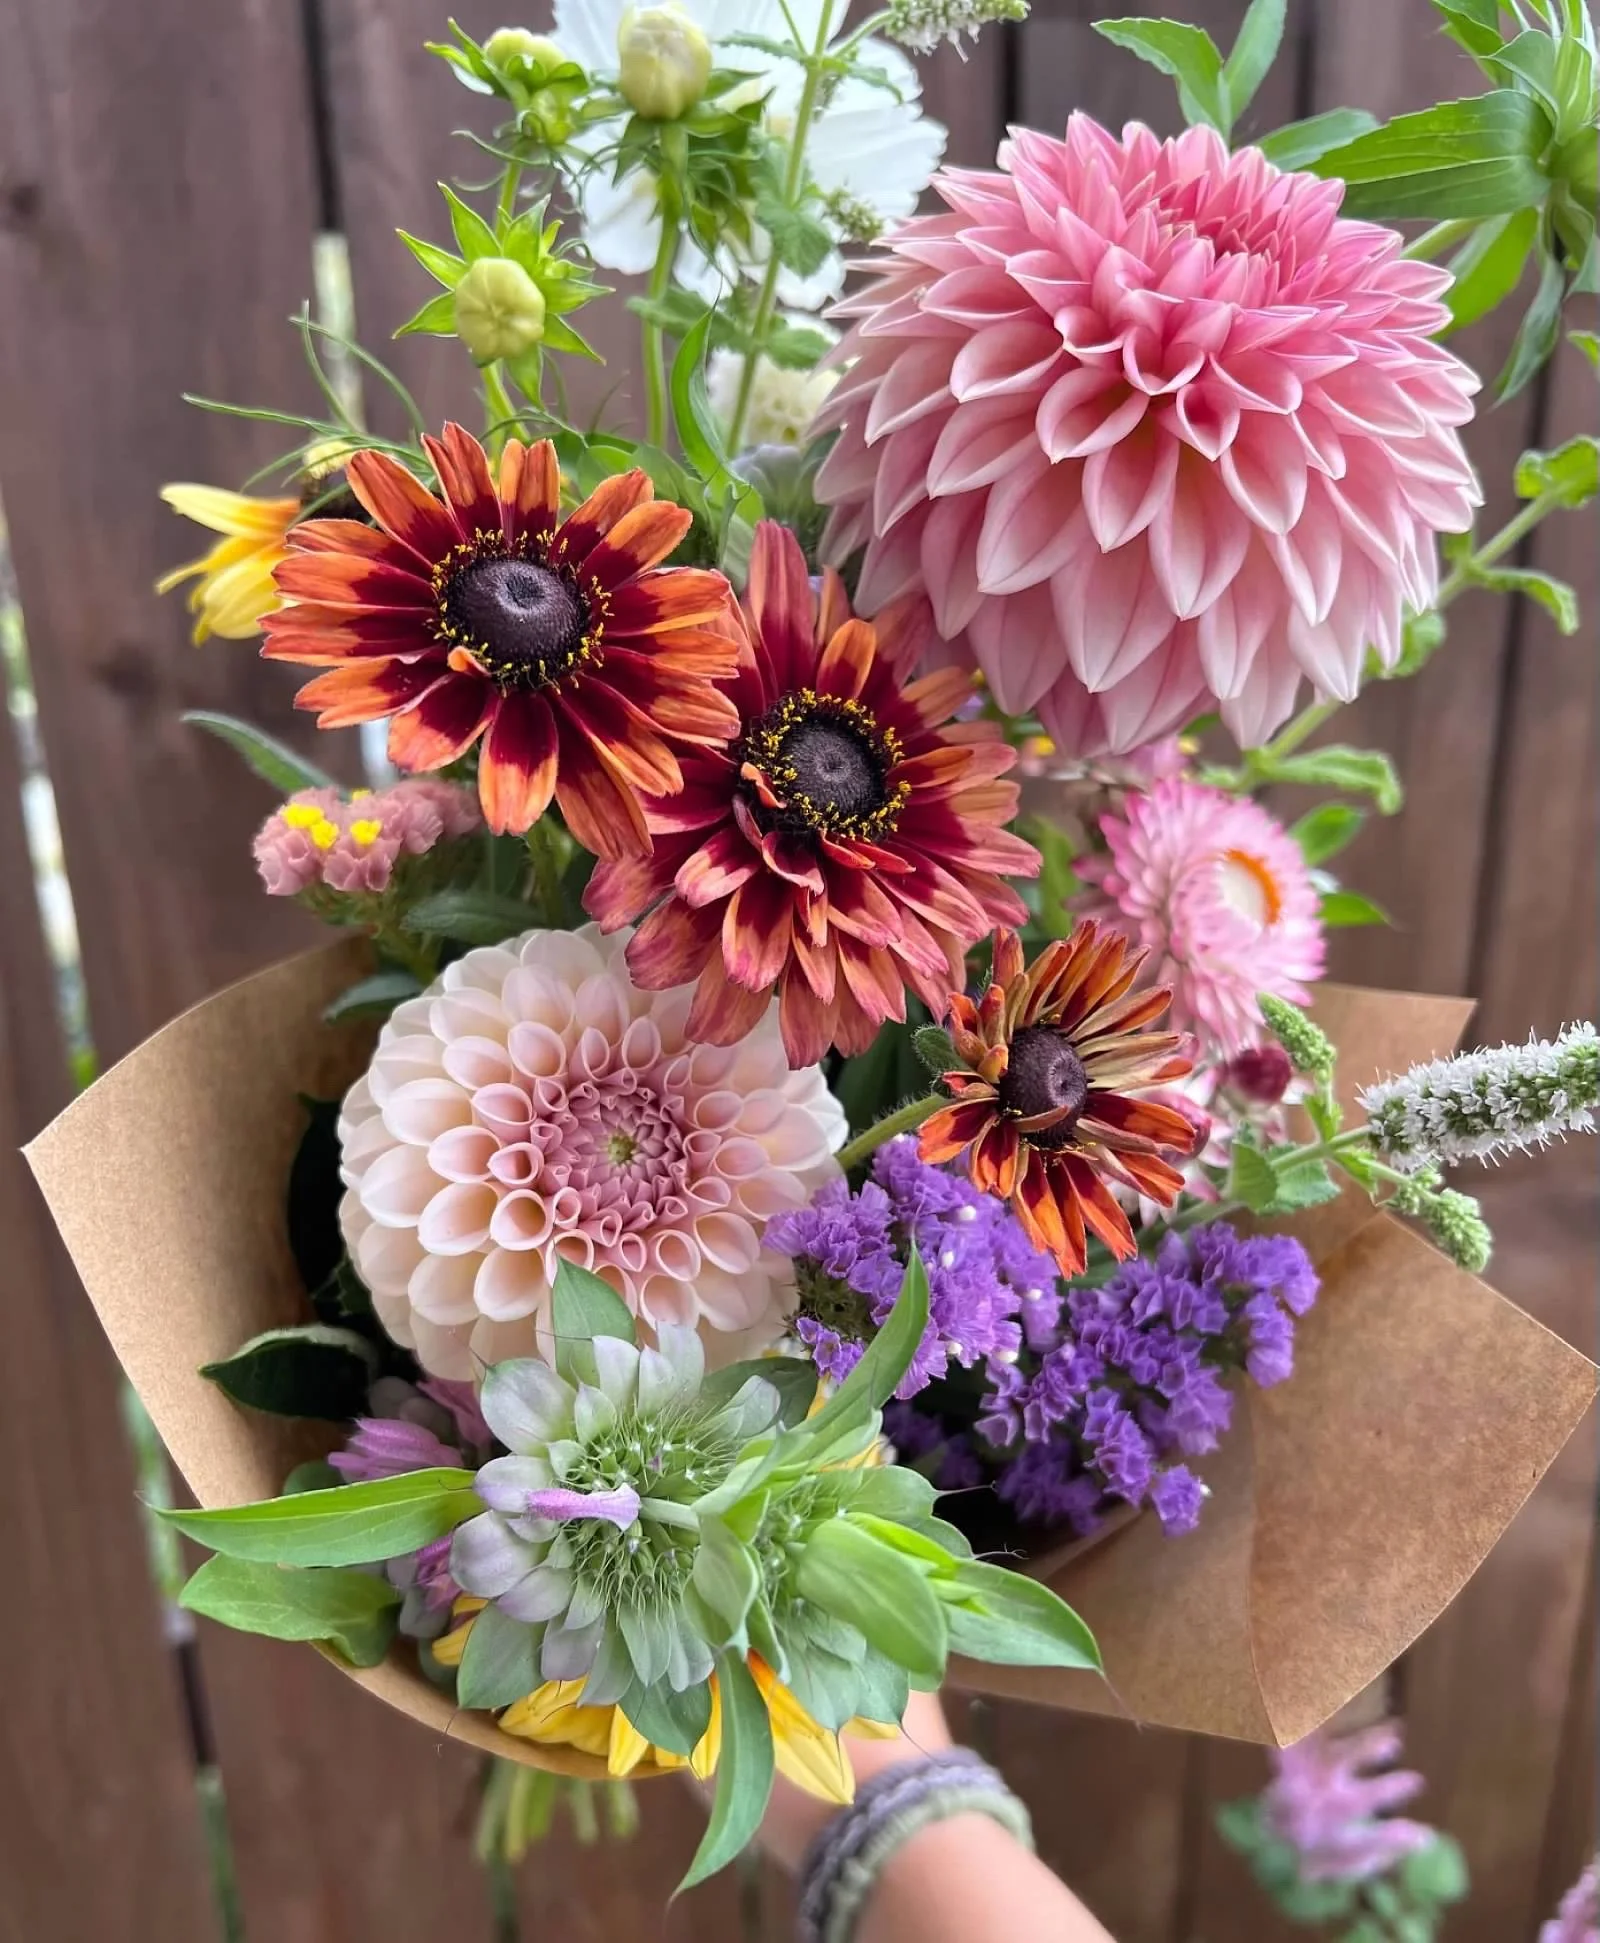
The Queen of Dahlias (Cafe Au Lait) in a summer bouquet
A fun gender reveal bouquet I got to do featuring Blizzard.

Irish Ruffles. The perfect white with a hint of blush. It is so prolific for being a larger sized bloom!
RM Whirligig. I’m currently in the process of rooting as many cuttings as possible of this beauty. It was one of my favorite new varieties last year!
Why I Started Farming
Spring is almost here and I CANNOT WAIT!
Spring is my favorite and spring flowers are my ABSOLUTE FAVORITE flowers! Give me all of the ruffly, double-bloomed goodness that is spring flowers! They’re extra sweet after a long cold, gloomy winter too.
I thought I’d take some time to share a little bit more about me, our farm, and why I began farming in the first place.
It all started in 2020 when the world changed for a lot of people. It changed drastically for me! We welcomed our first son, Finley on March 11th of 2020- the official day the WHO announced a global pandemic. I know this is a controversial topic for most, but I will say that having a brand new vulnerable baby when there was a looming virus floating around that no one knew much about was a terrifying experience. However, a lot of good came from that time of life as well.
After having Finley, I cut back on my work schedule as a Physical Therapist Assistant to part time so that I could have more time with him at home. More time at home also meant more time in the yard, going on walks and contemplating how I wanted our new life to look with this amazing new family member.
I have always had an interest in flowers. My mom gardened when I was a kid and allowed me to grow in a small space in her garden. I got to choose whatever plants I wanted in that space and to this day I still remember it so fondly. At the time my favorite flower was snapdragons. I loved “making them talk.”
My interest in flowers took off with more time at home to care for them. And as are most interests with me, it quickly became an obsession. That year I was gifted Floret Farm’s Cut Flower Garden book and I. Was. Hooked!
I began experimenting with indoor seed starting, different varieties, and learning everything I could about gardening, not expecting it to become a business venture, especially given the space I had to work with.
We live on ¼ acre of land (including our house). And it is anything but flat. I started with a few beds on the little bit of flat land we had and was dissatisfied with the amount I could grow.
In July of 2021, my sweet husband, Zack, suggested we excavate into our hillside a bit to allow more growing space. We went back and forth several times. Me saying “no its crazy, that would be too much work. We don’t even have a way to access it.” And him saying “I bet it wouldn’t be that bad. And we could build some stairs somehow to get up to them.”
Those were his famous last words. I don’t think he realized at the time what he was getting us into by starting that. We have now excavated beds all throughout our hillside as well and built two sets of stairs into the hillside to access all of the growing beds. Was it easy? Not in the slightest, but it has absolutely been worth it. Over 3 years we have done a little more and a little more to get the hillside in full production for this upcoming season and I can’t wait to see it all come together and be in full bloom!
I’m so grateful he nudged me to take the change in developing more of our land to make it possible to grow on. By doing that, we added enough to take the leap of starting a flower farm.
My incredible parents so graciously offered some of their land for me to grow on as well, so we developed a garden space at their home so that I can grow a larger volume as well. It will also be in full production for the first time this year, which is very exciting!
By having both spaces developed, we have been able to expand our offerings to join the Umpqua Valley Farmers Market this season, as well as increase our wholesale to florist offerings. We also have the ability to take on custom orders and weddings/events.
I am so thrilled to be entering our third year as a business and have more flowers than ever!
Thank you for following along with our adventure,
Shelby
Spring is almost here and I CANNOT WAIT!
Spring is my favorite and spring flowers are my ABSOLUTE FAVORITE flowers! Give me all of the ruffly, double-bloomed goodness that is spring flowers! They’re extra sweet after a long cold, gloomy winter too.
I thought I’d take some time to share a little bit more about me, our farm, and why I began farming in the first place.
It all started in 2020 when the world changed for a lot of people. It changed drastically for me! We welcomed our first son, Finley on March 11th of 2020- the official day the WHO announced a global pandemic. I know this is a controversial topic for most, but I will say that having a brand new vulnerable baby when there was a looming virus floating around that no one knew much about was a terrifying experience. However, a lot of good came from that time of life as well.
After having Finley, I cut back on my work schedule as a Physical Therapist Assistant to part time so that I could have more time with him at home. More time at home also meant more time in the yard, going on walks and contemplating how I wanted our new life to look with this amazing new family member.
I have always had an interest in flowers. My mom gardened when I was a kid and allowed me to grow in a small space in her garden. I got to choose whatever plants I wanted in that space and to this day I still remember it so fondly. At the time, my favorite flower was snapdragons. I loved “making them talk.”
My interest in flowers took off in 2020 since I was home more than ever before. And as are most interests go with me, it quickly became an obsession. That year I was gifted Floret Farm’s Cut Flower Garden book and I. Was. Hooked!
I began experimenting with indoor seed starting, different plant varieties, and learning everything I could about gardening. I had no intention of it becoming a business venture, especially given the smaller space I had to work with.
We live on ¼ acre of land (including our house). And it is anything but flat. I started with a few beds on the little bit of flat land we had around our house. It wasn’t much, but it was a start.
In July of 2021, my sweet husband, Zack, suggested we excavate into our hillside above our rock retaining wall to allow more growing space. We went back and forth several times. Me saying “no its crazy, that would be too much work. We don’t even have a way to access it.” And him saying “I bet it wouldn’t be that bad. And we could build some stairs somehow to get up there.”
Those were his famous last words.
I don’t think he realized at the time what he was getting us into by getting the ball rolling. We now have excavated beds all throughout our hillside as well as built two sets of stairs into the hillside to access all of the growing beds. Was it easy? Not in the slightest, but it has absolutely been worth it. Over 3 years we have done more and more to get the hillside in full production. I’m so excited that this upcoming season will be the first year all beds will be put to use and I can’t wait to see it all come together and be in full bloom!
I’m so grateful he nudged me to take the chance in developing more of our land to make it possible to grow more in our small space. By doing that, we added enough to take the leap of starting a flower farm.
My incredible parents so graciously offered some of their land for me to grow on as well, so we developed a garden space at their home so that I can grow a larger volume to increase our offerings. It will also be in full production for the first time this year, which is very exciting!
By having both spaces developed, we have been able to expand our offerings to join the Umpqua Valley Farmers Market this season, as well as increase our wholesale to florist offerings. We are also able to take custom orders for weddings and events.
I am so thrilled to be entering our third year as a business and have more flowers than ever!
Thank you for following along with our adventure. I’d love to hear what you are most excited about this year!
Shelby

Before we had any fencing up. Fencing was a must due to extreme deer pressure. They live in the big trees behind our property and regularly came down for “snacks.” They weren’t picky, they’d eat everything but lavender and peonies at our property.


This was the first bit to be excavated by hand with a pick axe, a rake, and shovels.

It turned into these 4 raised beds.

Fall of year one.

All of our compost gets up the hillside in 5 gallon buckets.


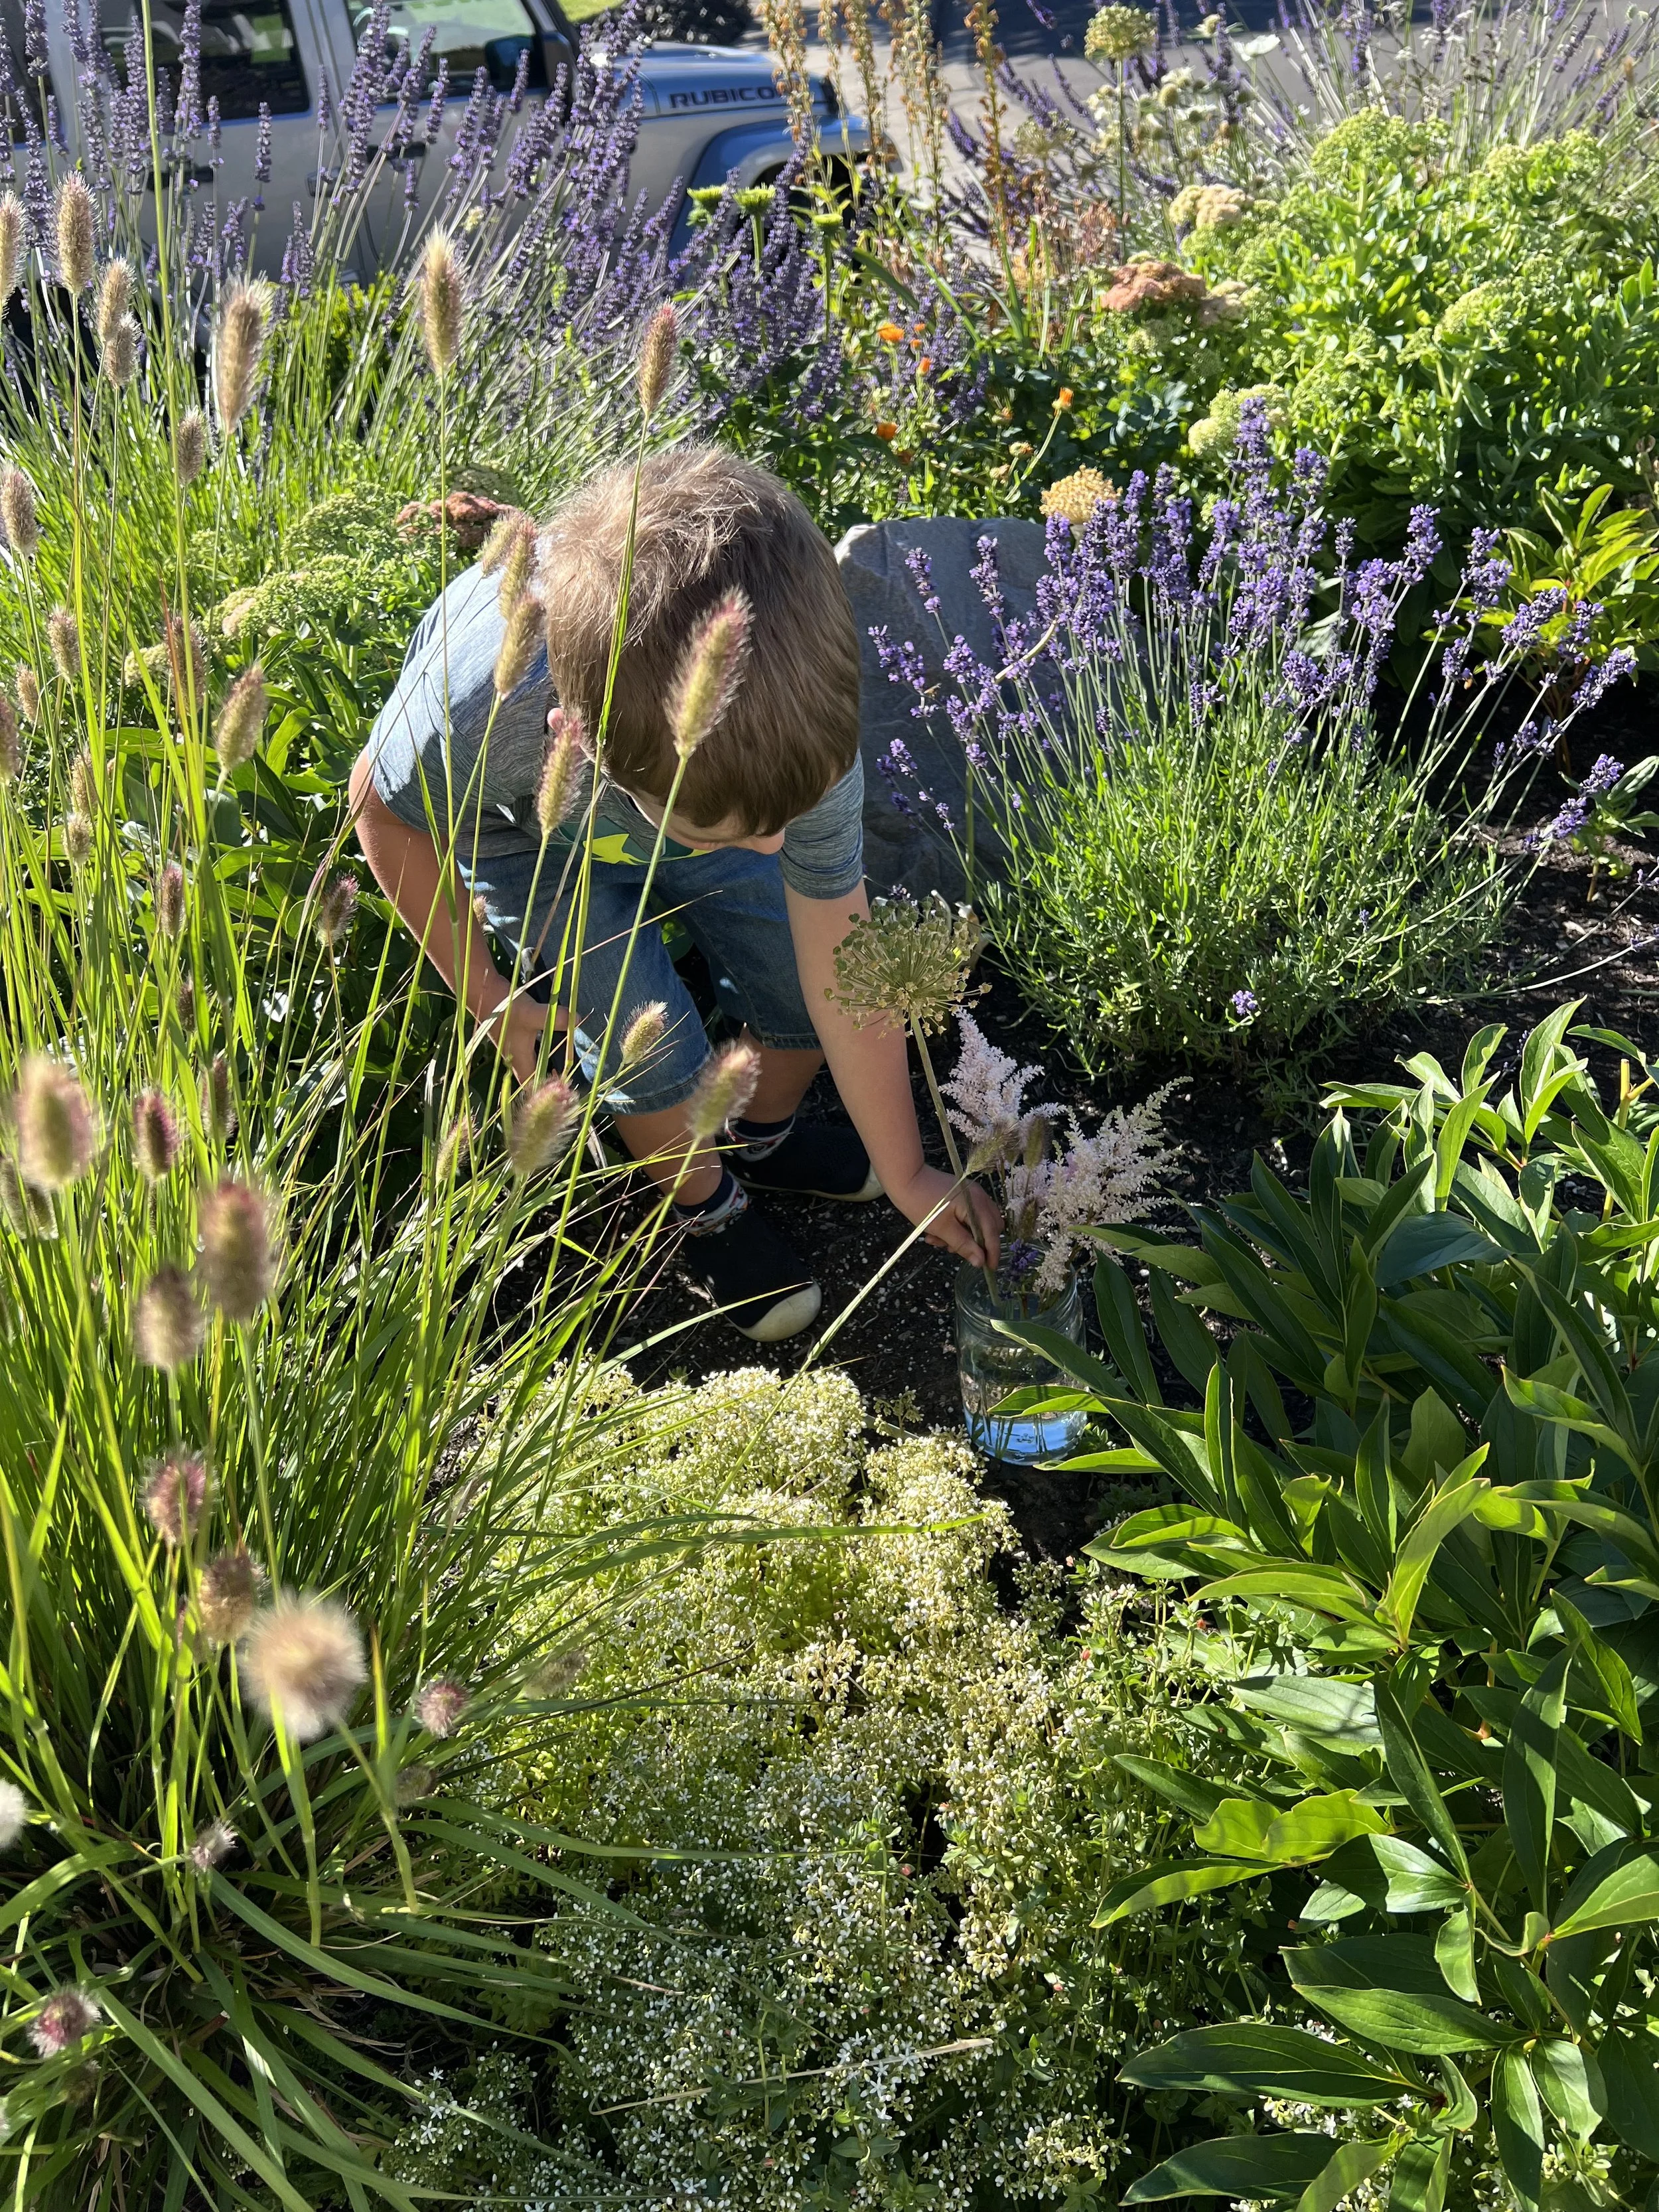
Farmer Finn is always ready to jump in and work!
